



Contrôler votre éclairage domestique par commandes vocales
Composants et fournitures
- 1 × Arduino UNO
- 1 × 1Sheeld
- 3 × LED (couleurs différentes, ex: bleu, jaune, vert)
À propos de ce projet
L'idée est de prouver qu'on peut piloter son système d'éclairage domestique uniquement par la voix. Les 3 LED représentent différents systèmes de la maison (ex: salon, cuisine, chambre).

Matériel nécessaire
- Arduino Uno
- 1Sheeld
- 3 LED (couleurs différentes)
Câblez le circuit comme indiqué :

Mise en œuvre
- Ouvrez l'application 1Sheeld et connectez-la à votre shield.
- Ouvrez le shield Reconnaissance vocale (Voice Recognition).
- Appuyez sur « Tap to speak » et dites « play » → les 3 LED s'allument.

- Dites « stop » → les 3 LED s'éteignent.
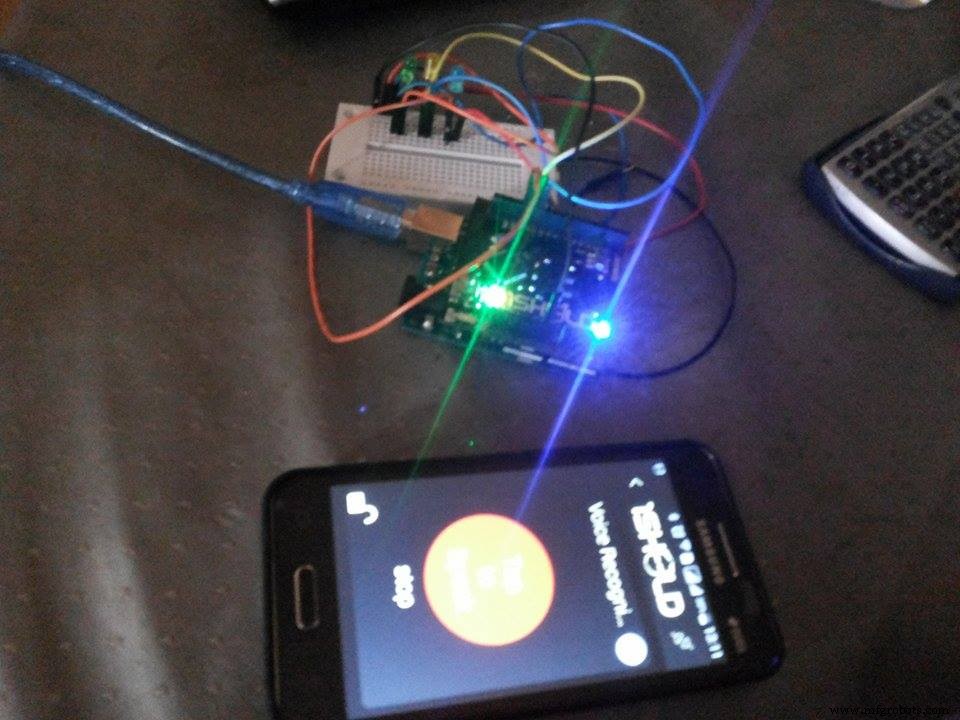
- Dites « blue » → seule la LED bleue s'allume.

- Dites « yellow » → seule la LED jaune s'allume.

- Dites « green » → seule la LED verte s'allume.


Code
Fichier principal (Arduino)
#define CUSTOM_SETTINGS
#define INCLUDE_VOICE_RECOGNIZER_SHIELD
#define INCLUDE_MUSIC_PLAYER_SHIELD
#define INCLUDE_TERMINAL_SHIELD

#include <OneSheeld.h>

int Bledpin = 13;  // Bleu
int Yledpin = 12;  // Jaune
int Gledpin = 11;  // Vert

// Commandes vocales définies par l'utilisateur
const char playCommand[]     = "play";
const char pauseCommand[]    = "stop";
const char stopCommand[]     = "yellow";  // Note: variable mal nommée dans l'original
const char nextCommand[]     = "green";   // Note: variable mal nommée dans l'original
const char BlueCommand[]     = "blue";

void setup() {
  pinMode(13, OUTPUT);
  pinMode(12, OUTPUT);
  pinMode(11, OUTPUT);

  OneSheeld.begin();

  VoiceRecognition.setOnError(error);
  VoiceRecognition.start();
}

void loop() {
  if (VoiceRecognition.isNewCommandReceived()) {
    // Commande "play" : allume tout
    if (!strcmp(playCommand, VoiceRecognition.getLastCommand())) {
      digitalWrite(13, HIGH);
      digitalWrite(12, HIGH);
      digitalWrite(11, HIGH);
    }
    // Commande "stop" : éteint tout
    else if (!strcmp(pauseCommand, VoiceRecognition.getLastCommand())) {
      digitalWrite(13, LOW);
      digitalWrite(12, LOW);
      digitalWrite(11, LOW);
    }
    // Commande "yellow" : allume seulement jaune
    else if (!strcmp(stopCommand, VoiceRecognition.getLastCommand())) {
      digitalWrite(13, LOW);
      digitalWrite(12, HIGH);
      digitalWrite(11, LOW);
    }
    // Commande "green" : allume seulement vert
    else if (!strcmp(nextCommand, VoiceRecognition.getLastCommand())) {
      digitalWrite(13, LOW);
      digitalWrite(11, HIGH);
      digitalWrite(12, LOW);
    }
    // Commande "blue" : allume seulement bleu
    else if (!strcmp(BlueCommand, VoiceRecognition.getLastCommand())) {
      digitalWrite(12, LOW);
      digitalWrite(13, HIGH);
      digitalWrite(11, LOW);
    }
  }
}

// Gestion des erreurs
void error(byte errorData) {
  switch (errorData) {
    case NETWORK_TIMEOUT_ERROR: Terminal.println("Network timeout"); break;
    case NETWORK_ERROR:         Terminal.println("Network Error"); break;
    case AUDIO_ERROR:           Terminal.println("Audio error"); break;
    case SERVER_ERROR:          Terminal.println("No Server"); break;
    case SPEECH_TIMEOUT_ERROR:  Terminal.println("Speech timeout"); break;
    case NO_MATCH_ERROR:        Terminal.println("No match"); break;
    case RECOGNIZER_BUSY_ERROR: Terminal.println("Busy"); break;
  }
}
Schémas
circuit.fzz (fichier Fritzing)
Lecteur/Écrivain de disquettes Amiga sur Arduino – Version 2.2
Éclairage d'escalier RGB intelligent – Activation par mouvement, installation facile
Processus de fabrication
- Transition des systèmes de contrôle industriels vers les réseaux sans fil
- Installer Google Assistant sur un MATRIX Voice Raspberry Pi – Guide étape par étape
- Étendre GoPiGo v2 sur Windows 10 IoT Core pour Raspberry Pi 3
- Gagner en efficacité : Intégrer la conception électrique à l'ERP pour un avantage concurrentiel
- Construire une Tirelire Intelligente : Contrôler un Accepteur de Pièces avec Arduino Nano
- Protéger les Systèmes de Contrôle Industriels : Stratégies Éprouvées et Bonnes Pratiques
- Réussite de la Migration de Système de Contrôle : Stratégies Expertes pour une Transition Fluide
- Huit étapes éprouvées pour diagnostiquer et corriger votre système de contrôle de process
- Boostez l'efficacité : réalisez un audit système complet dès aujourd'hui