


Mélodie de joyeux anniversaire sur Arduino Nano avec polyphonie à 3 voies
Composants et fournitures
 |
| × | 1 |
Applications et services en ligne
 |
|
À propos de ce projet
Jouez sur le thème polyphonique "Joyeux anniversaire" sur Arduino Nano avec trois buzzers sur une seule mini planche à pain.
Tout d'abord - démonstration
Branchez ce truc sur n'importe quelle source d'alimentation USB (pas seulement un ordinateur) et il jouera la mélodie "Joyeux anniversaire" indéfiniment... comme presque... jusqu'à ce que vous en ayez vraiment marre =]
BTW, les lumières clignotent avec tact à chaque changement de note dans un canal/buzzer correspondant.
Schémas
L'idée était de faire un appareil super compact sans (presque) aucune soudure.
Finalement, j'ai réussi à mettre tout le nécessaire sur une petite planche à pain comme celle-ci :
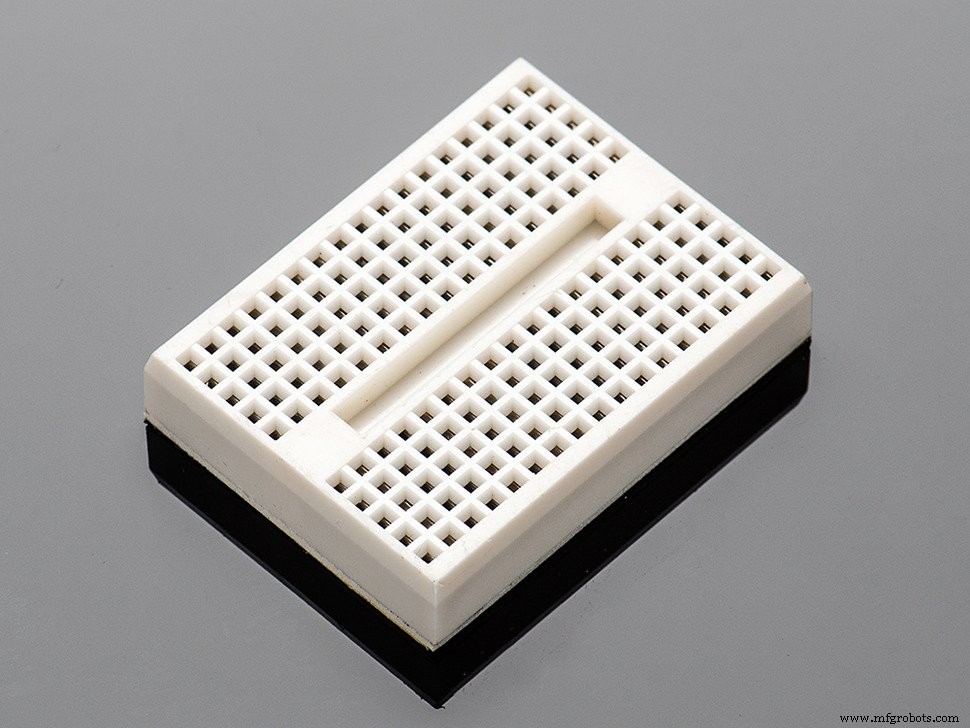
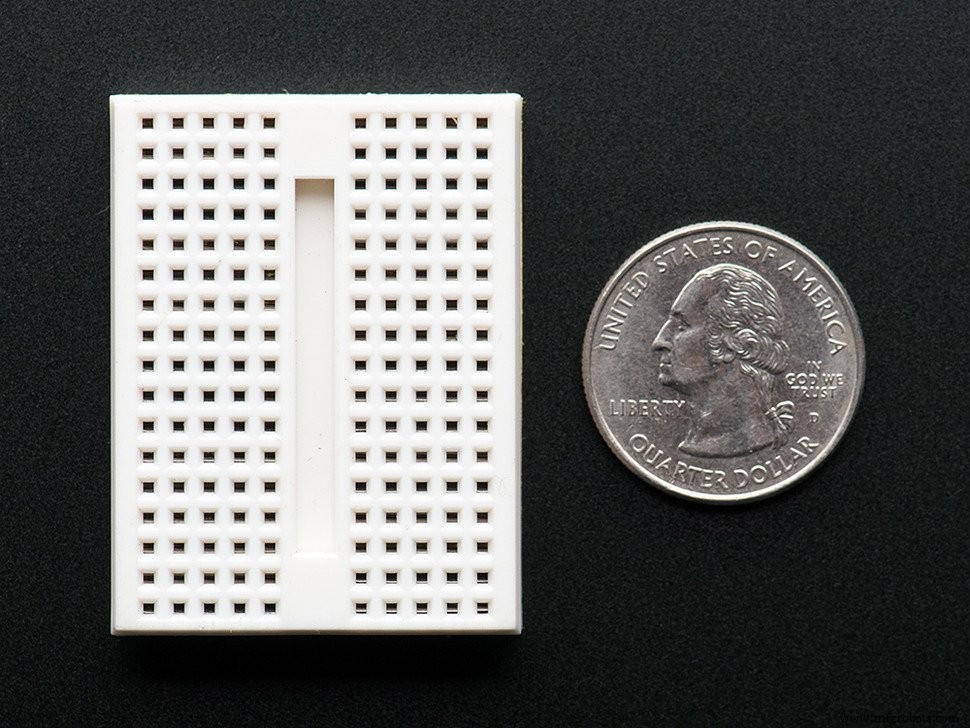
Les trous sont interconnectés à l'intérieur de la maquette de la manière suivante :
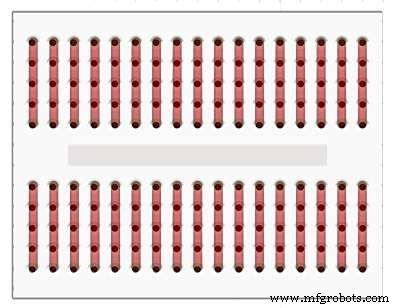
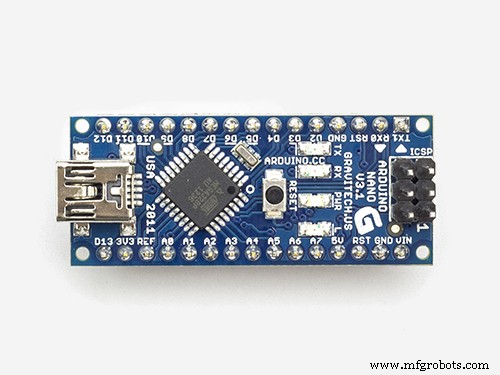
L'astuce ici est que la carte Arduino Nano s'intègre parfaitement dans une telle planche à pain, ce qui nous permet de connecter des composants supplémentaires des deux côtés de la planche à pain.
Désolé, les gars... Je suis trop paresseux pour dessiner des diagrammes ici mais ce cas est SI simple que je suis sûr que ces gros plans seront plus que suffisants pour tout comprendre =]
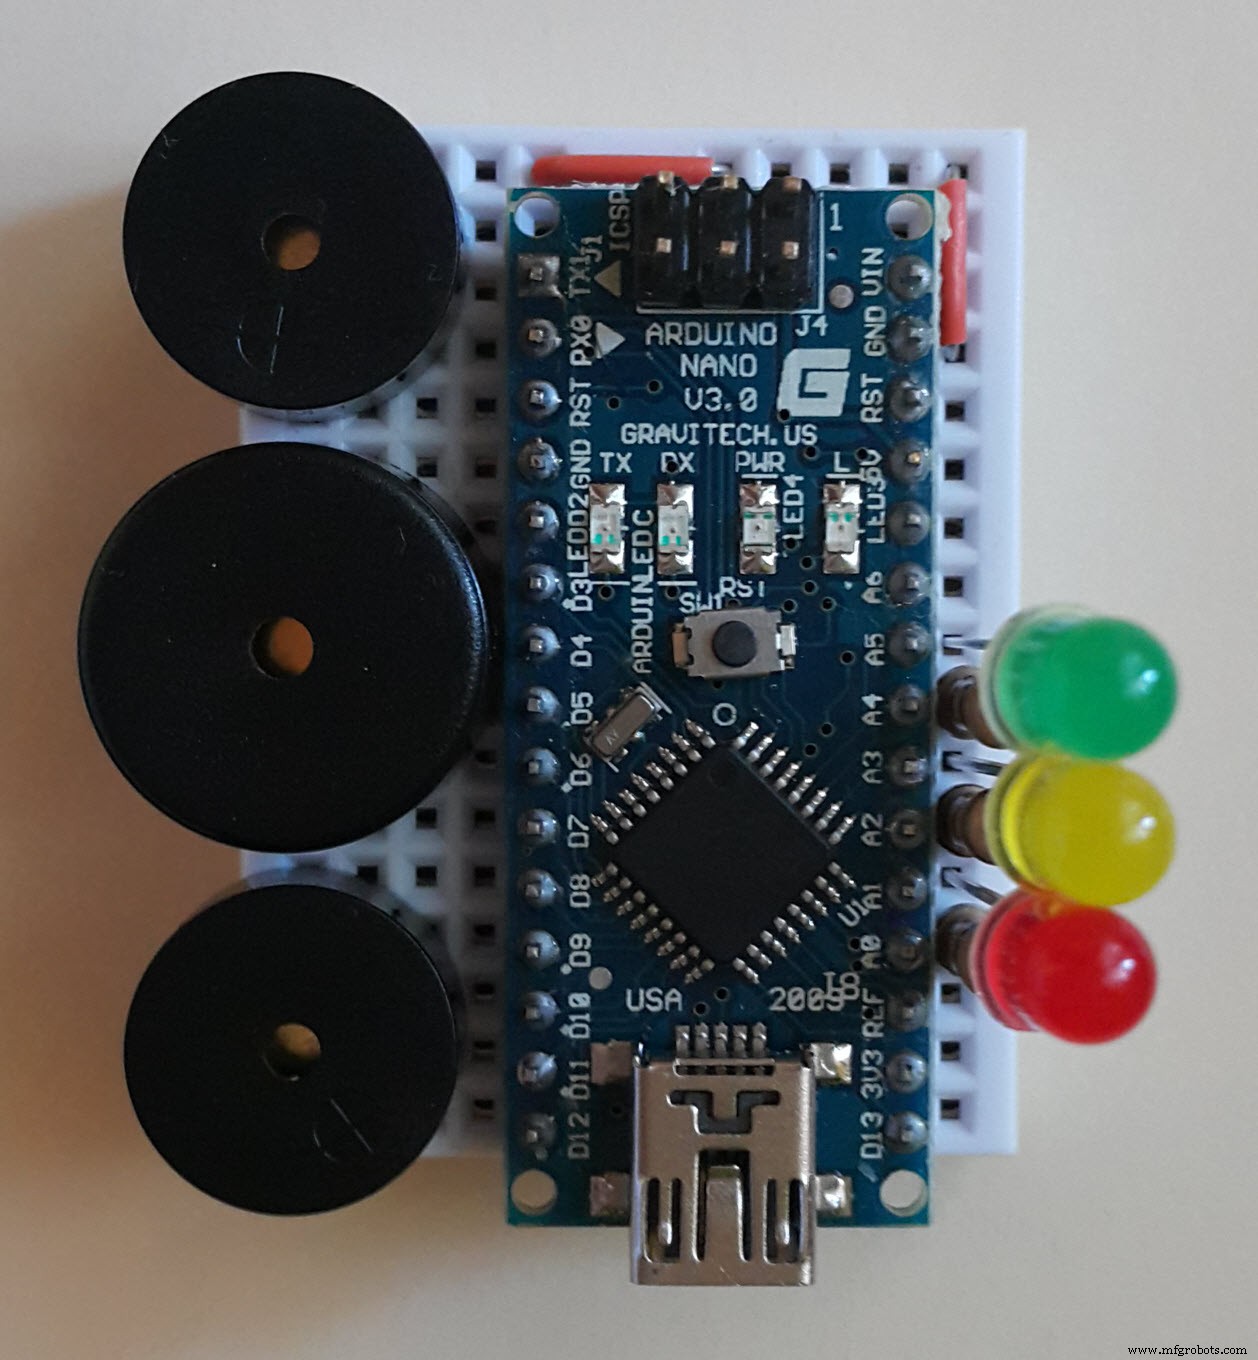
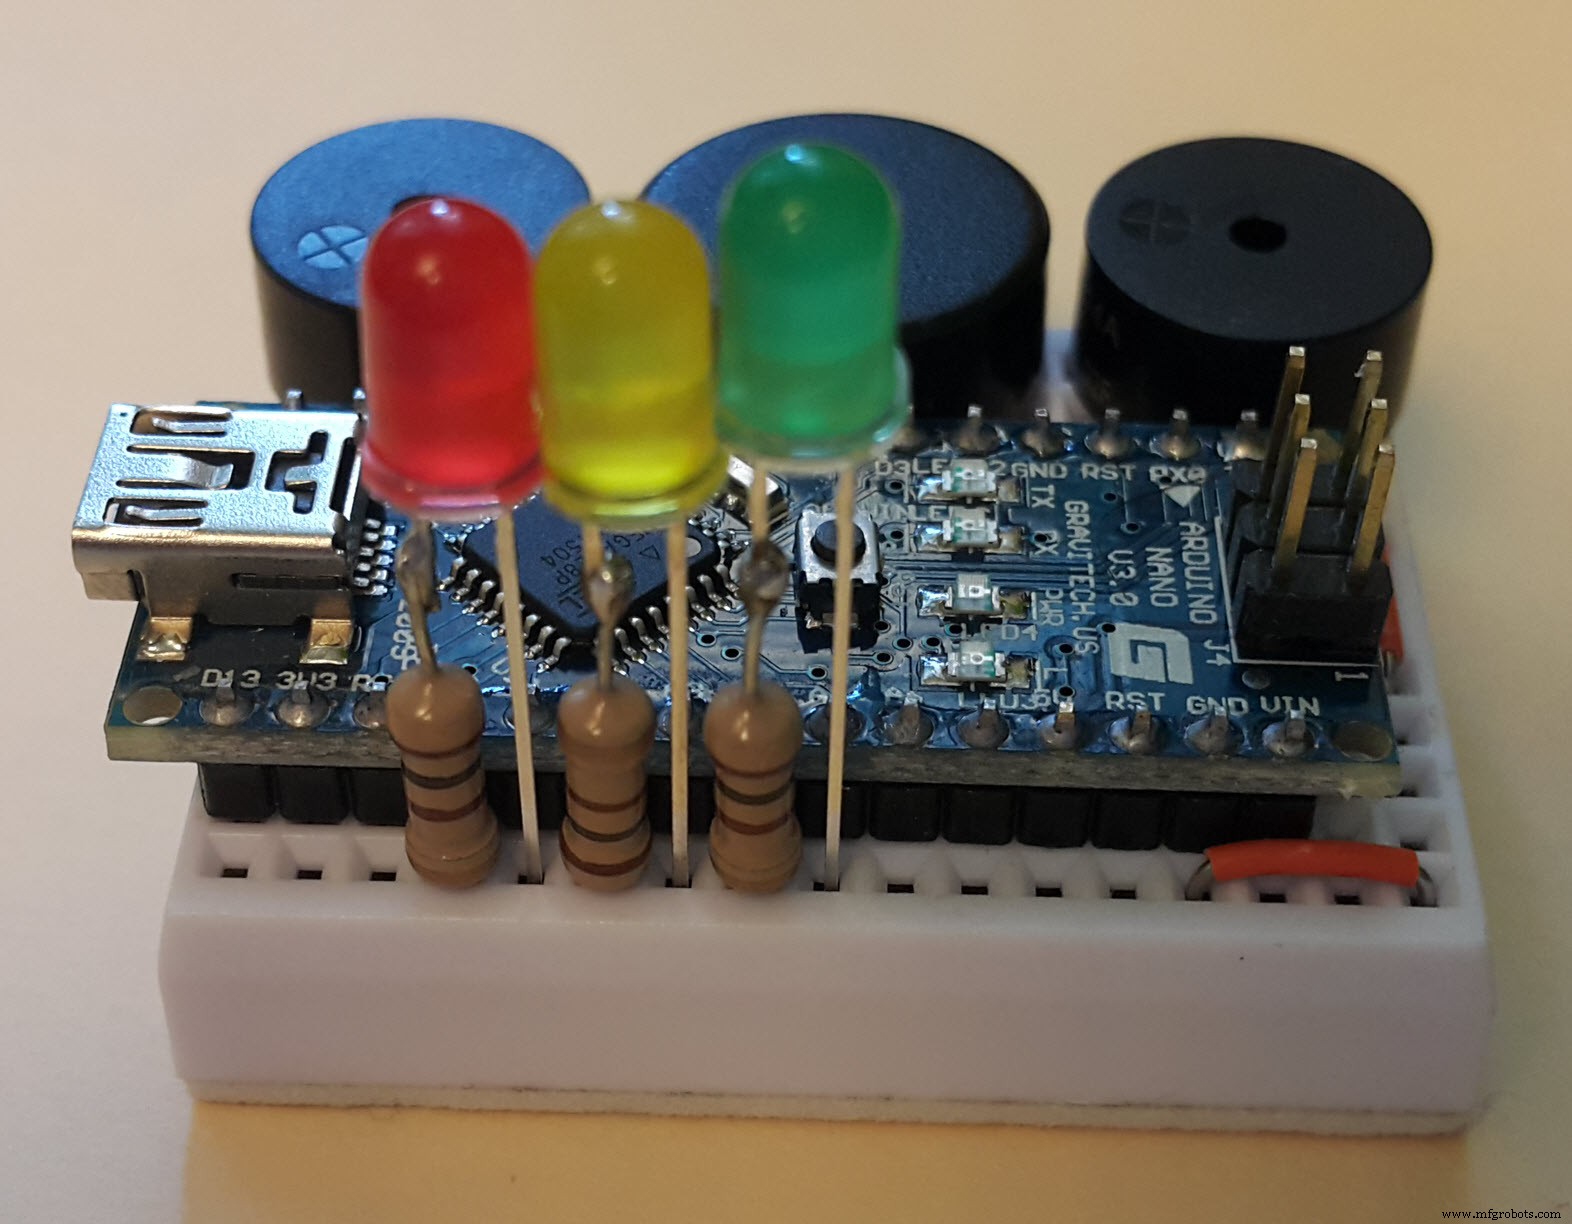
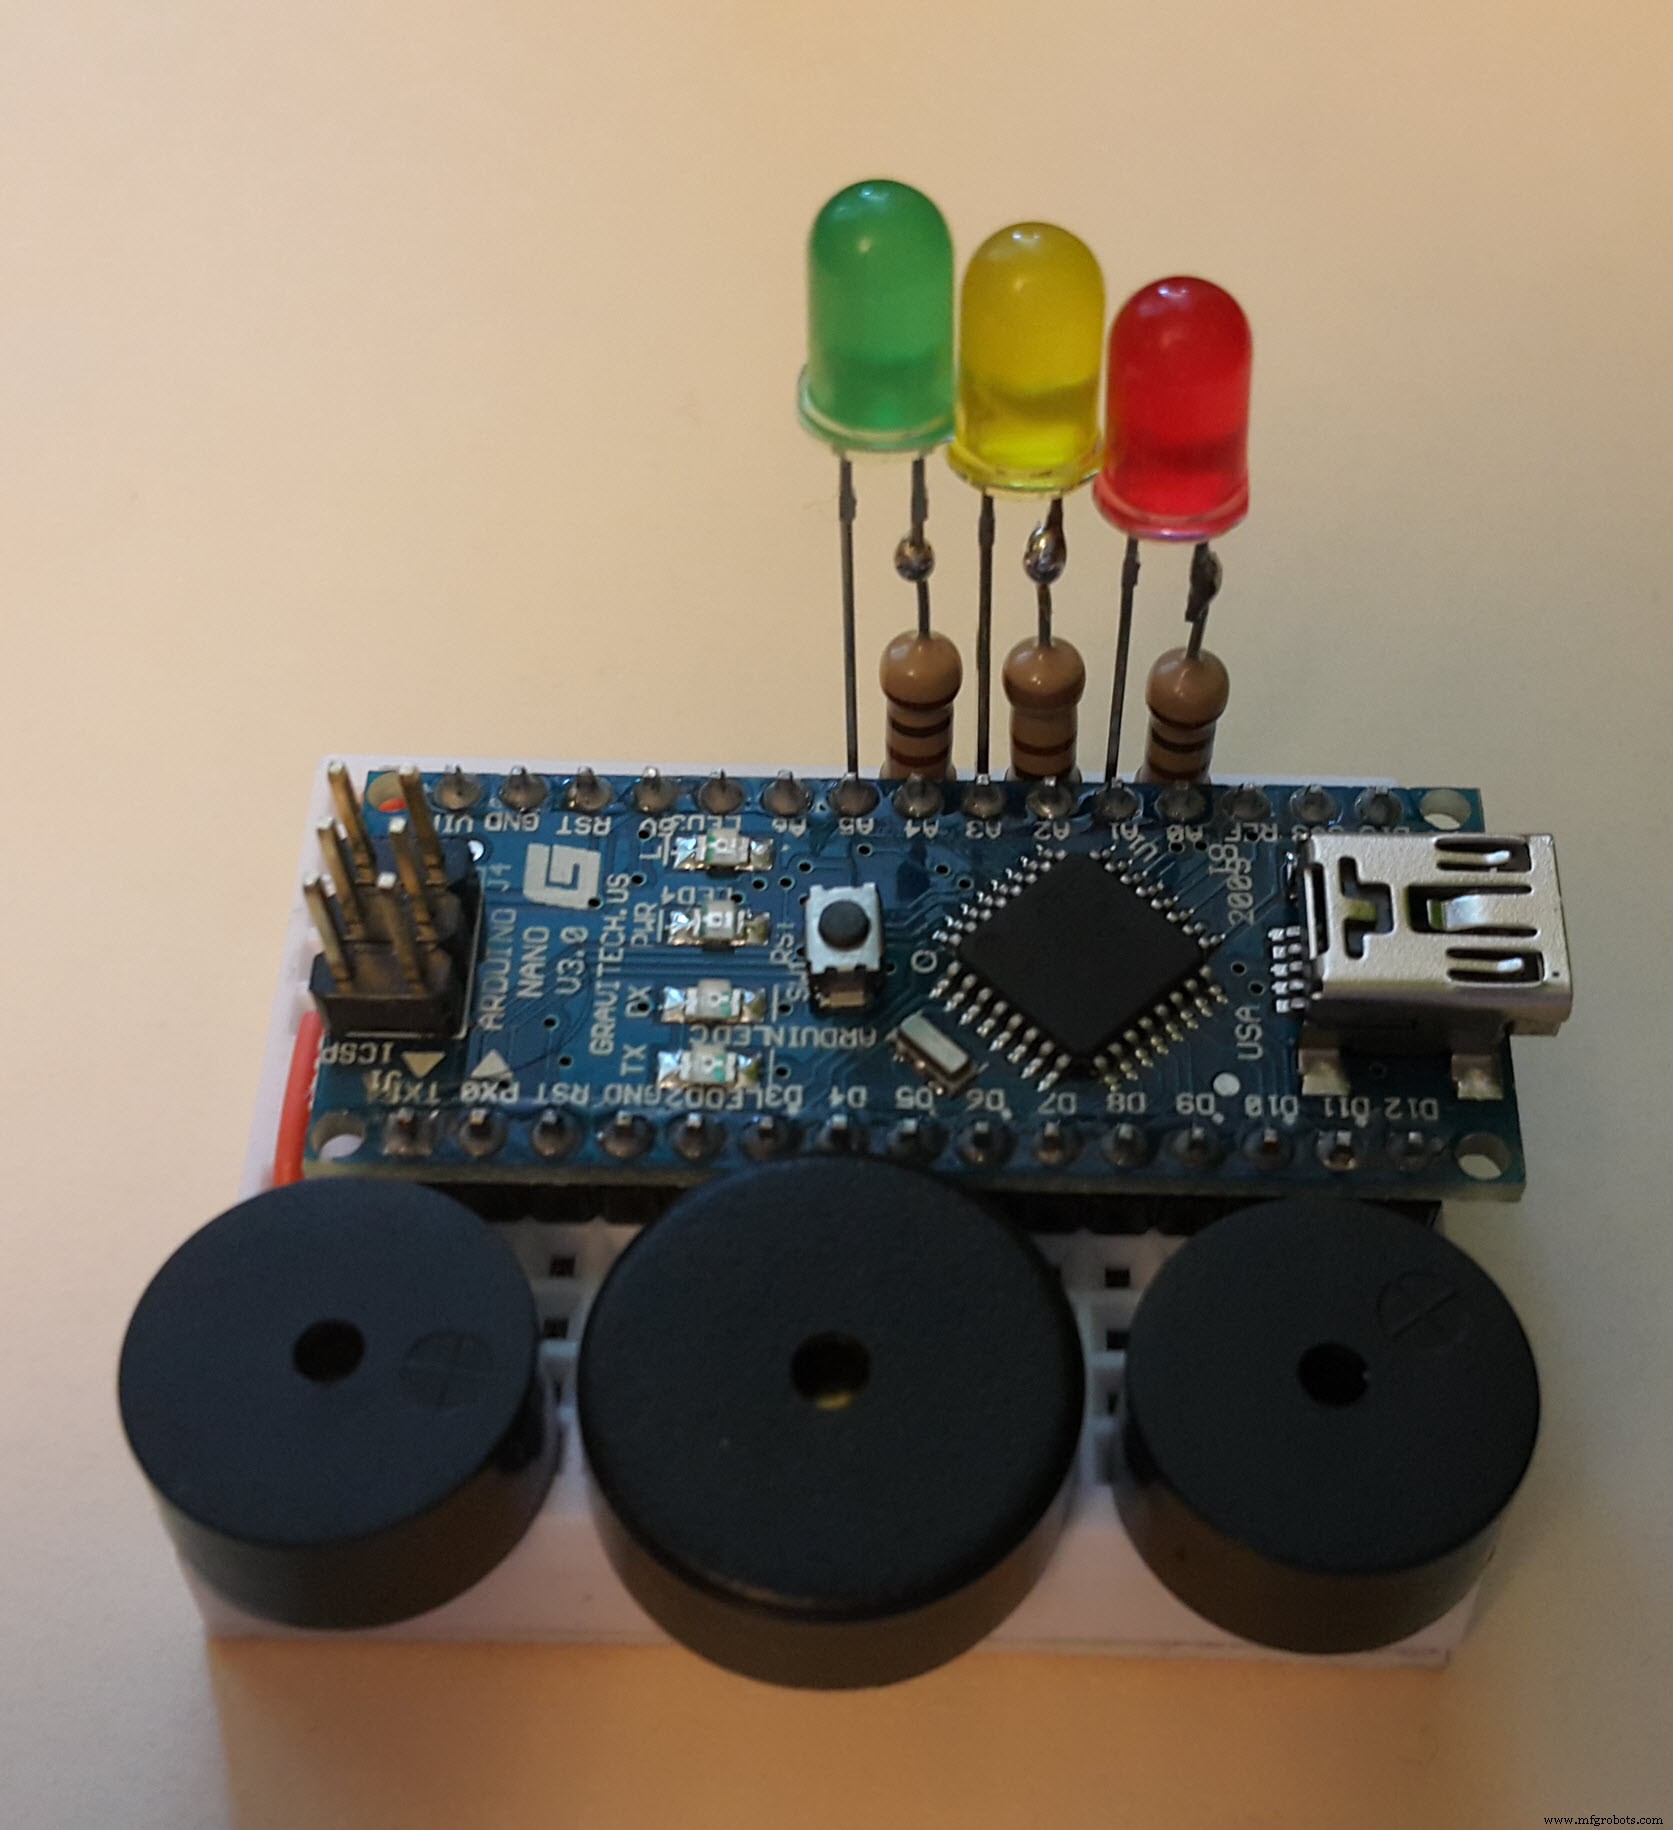

Comme vous pouvez le voir, j'utilise ici la carte Arduino Nano v3.0 de Gravitech, mais n'importe quel analogue fera l'affaire. Les buzzers et les LED ici sont TRES ordinaires. En fait, ils n'ont pas besoin de correspondre à des paramètres spéciaux.
Les résistances ici sont de 100 Ohm... bien que le "standard" commun pour la protection contre les surcharges LED soit de 220 Ohm... mais qu'importe... ¯\_(ツ)_/¯
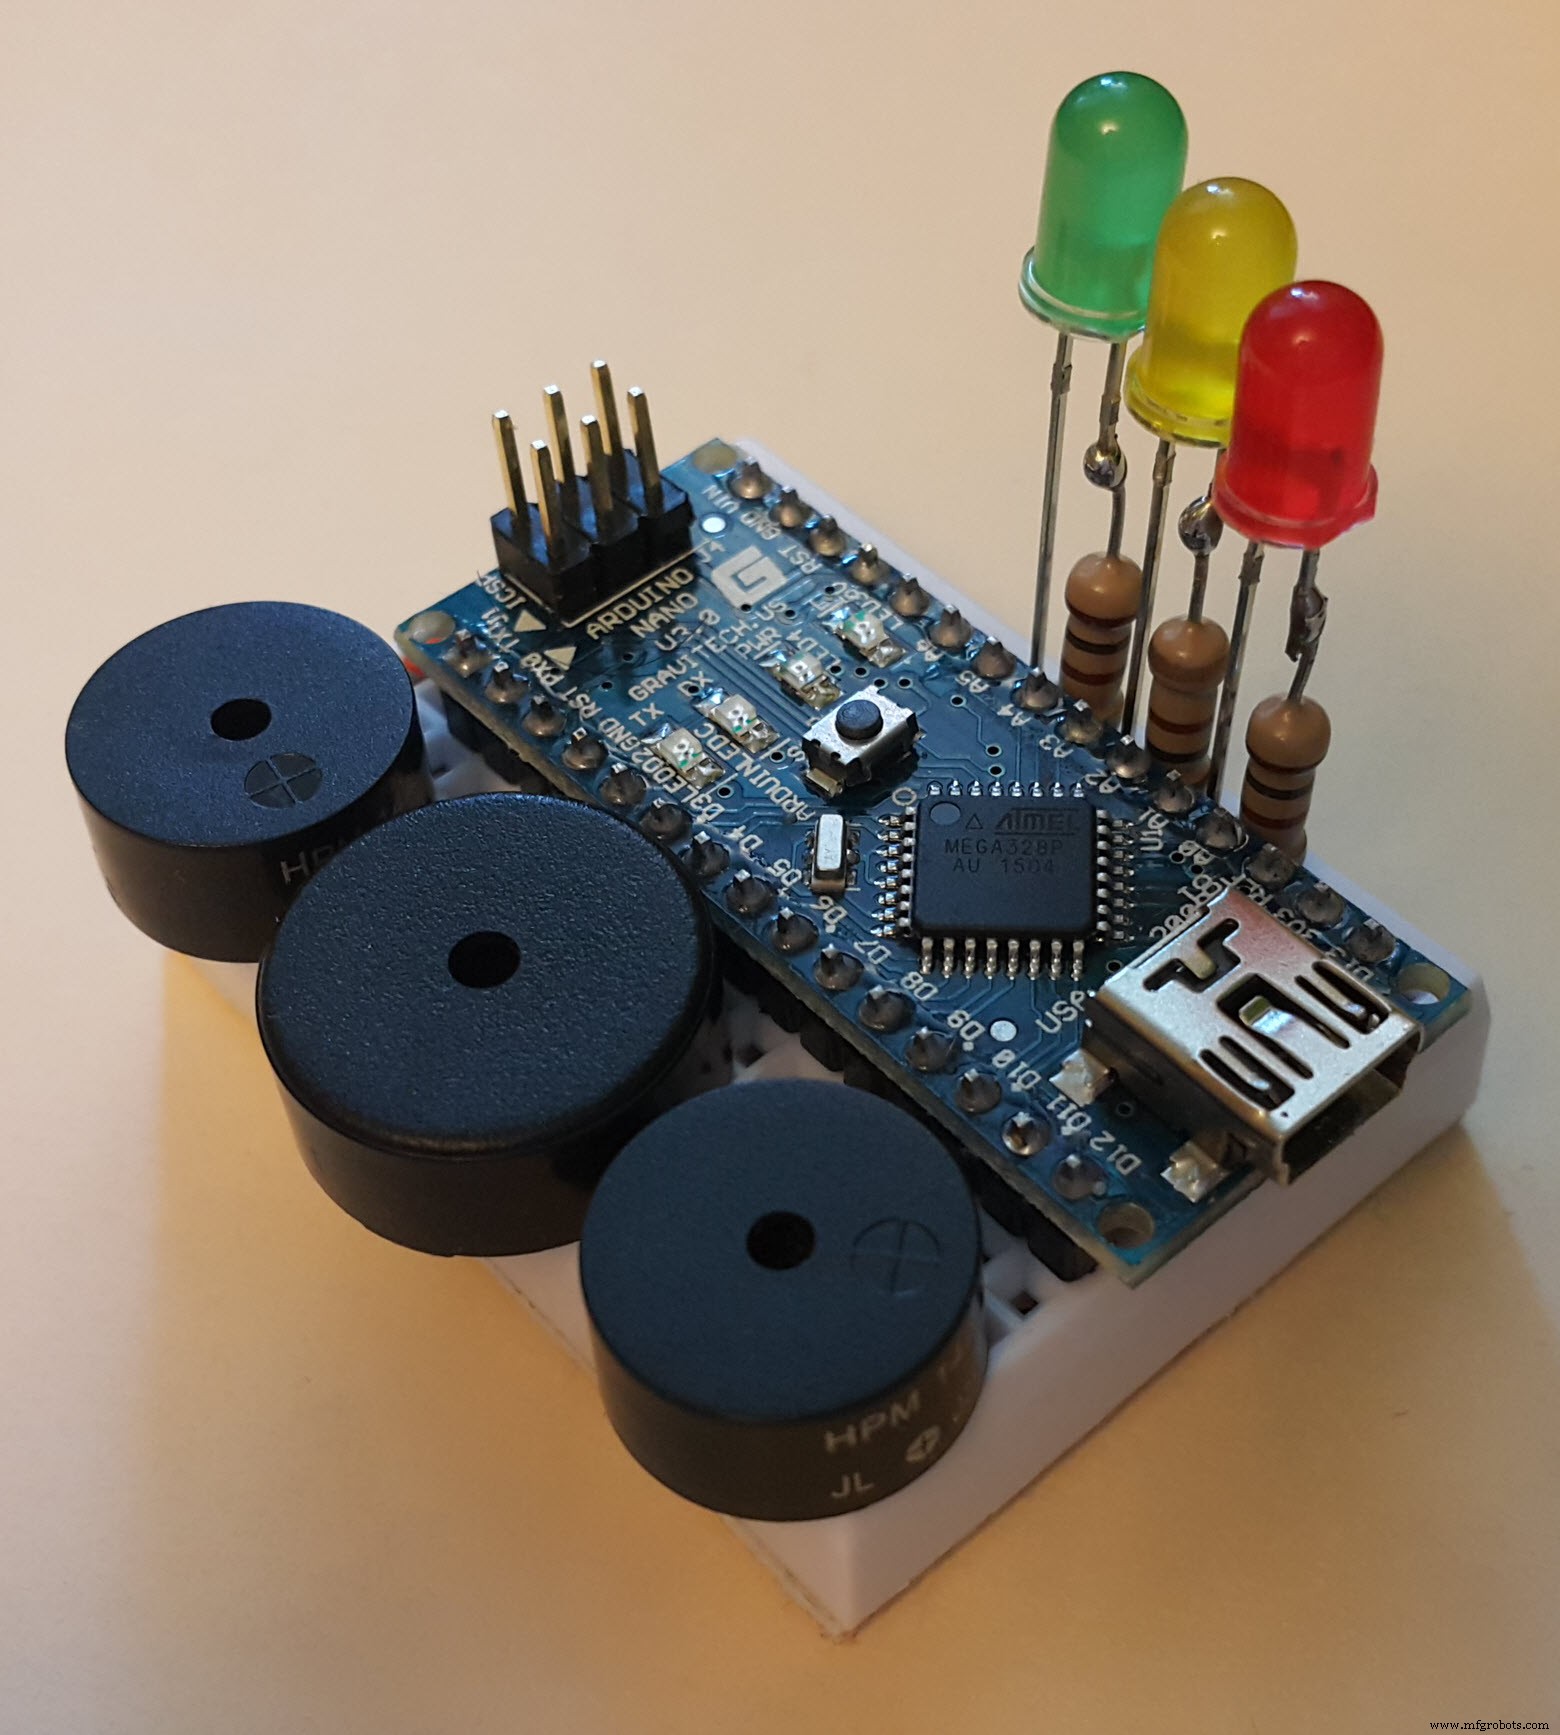
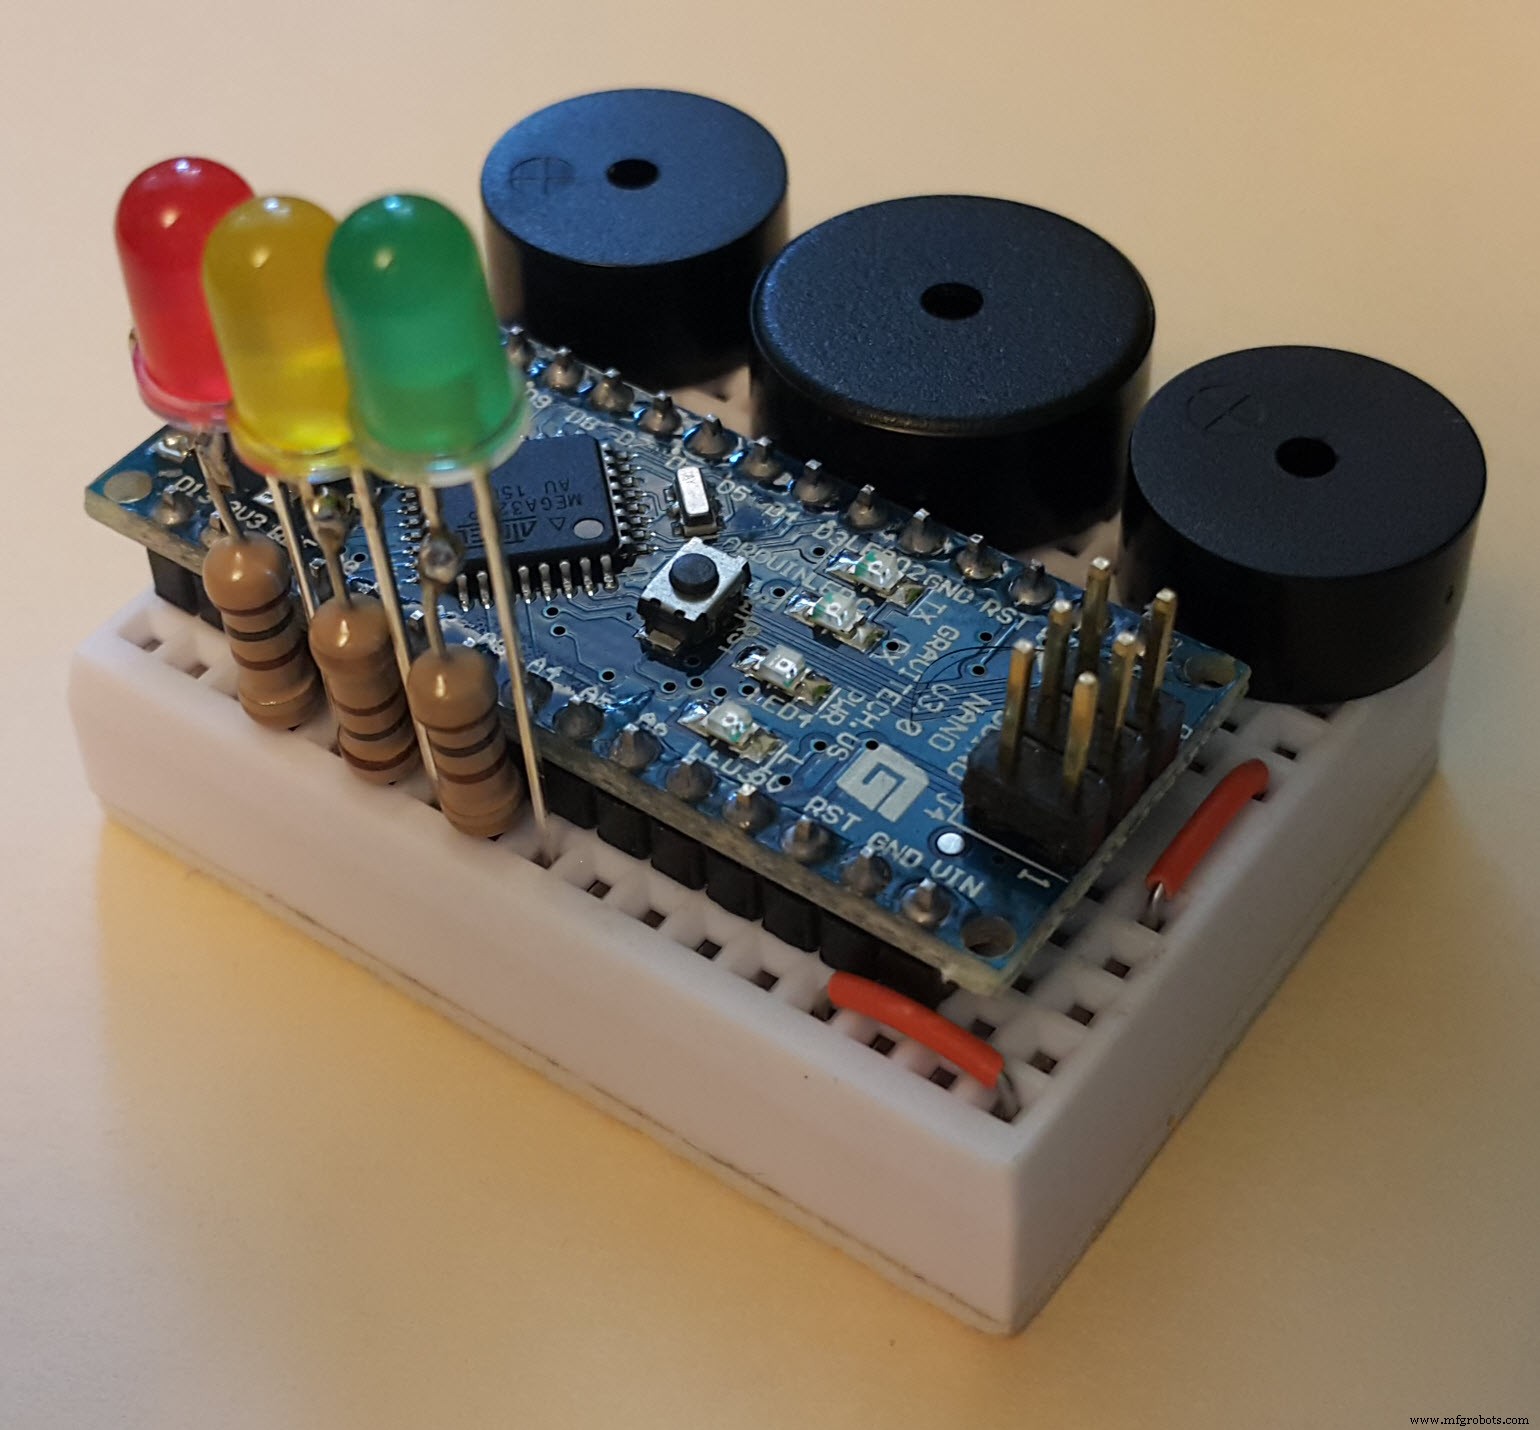
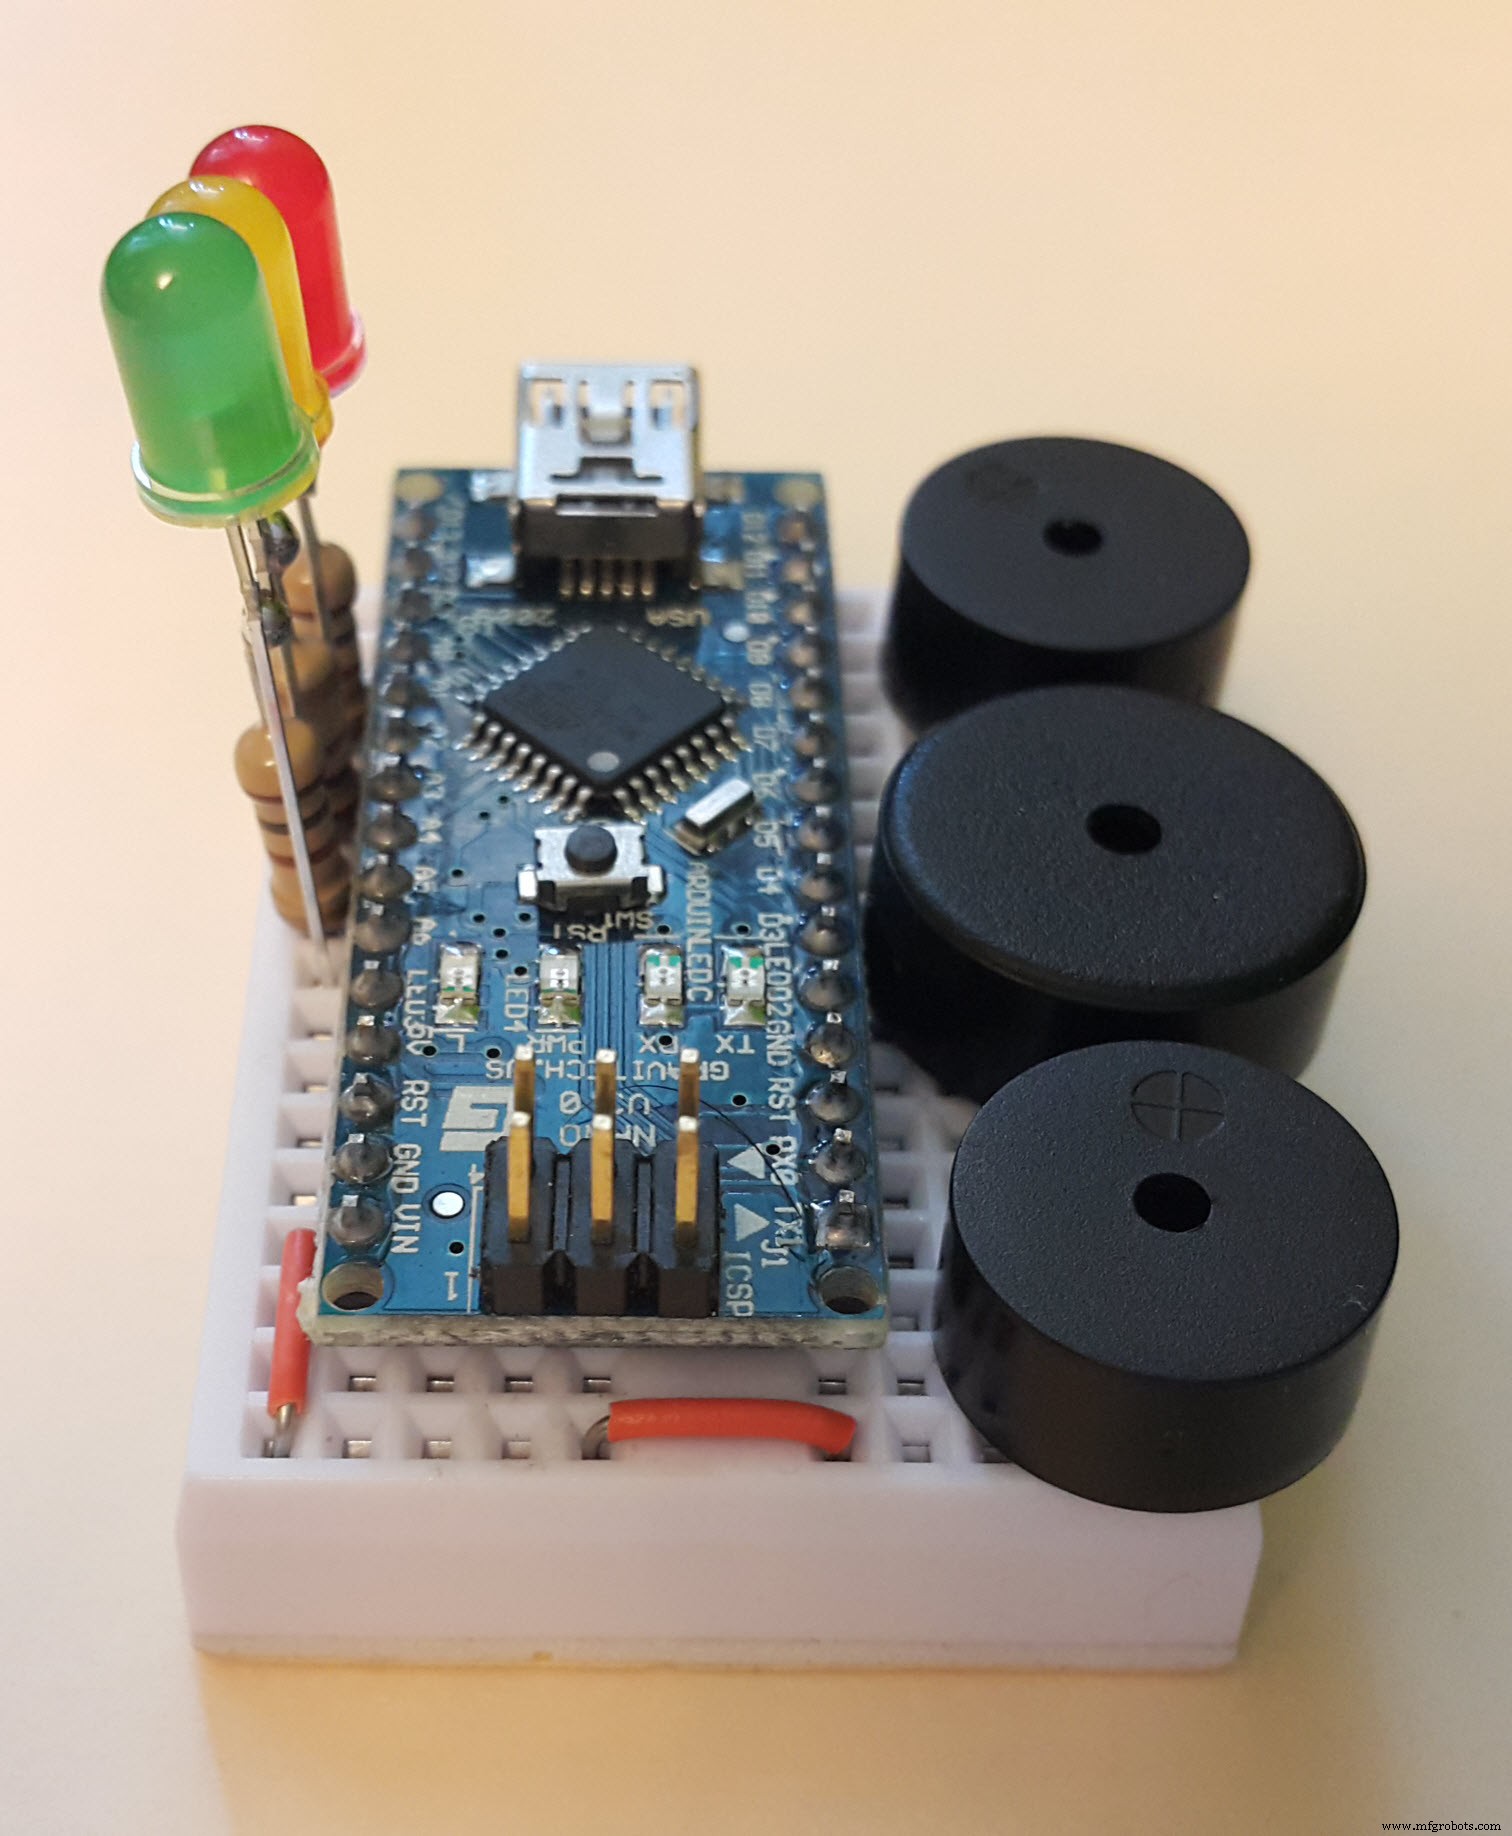
La seule chose qui n'est probablement pas si évidente ici sur ces photos, c'est que les broches des buzzers sont insérées dans la planche à pain de cette façon :

Notez également que celui du centre est plus grand que les autres - c'est parce que celui-ci est utilisé pour la chaîne musicale "basse" ☝🏻
... je rigole! ^__^ Ils couinent tous comme un chœur de souris fou sans aucune différence dans leurs capacités sonores =]
Vous pouvez donc utiliser trois buzzers identiques si vous le souhaitez sans problème, cependant vous devrez les placer dans des positions un peu différentes sur la maquette et également modifier les numéros de broche de sortie dans le code du programme en fonction de votre nouveau placement de buzzers.
Notez également un autre petit "hack" ici... de toute façon sommes-nous sur Hack ster ici ou quoi? =] J'utilise donc plusieurs E/S d'Arduino épingles ici comme un sol broches pour buzzers et LED 😱😱 . Oui c'est vrai. En fait, si vous définissez un état "LOW" pour n'importe quelle broche d'E/S Arduino dans votre programme, vous pouvez utiliser ces broches de la même manière que vous utilisez les broches GND standard sur les cartes Arduino. Cool, non ?;)
A propos du programme...
La liste complète de l'esquisse Arduino IDE est fournie ci-dessous. Cependant, vous devrez installer une bibliothèque "Tone" supplémentaire pour pouvoir compiler le sketch que vous pouvez télécharger ici :
https://www.dropbox.com/s/q1udxg4yi47emeo/Tone.zip?dl=0
(s'il y a une fenêtre pop-up avec une "proposition" d'inscription, fermez-la simplement avec le bouton "x" dans le coin)
La façon la plus simple d'installer cette bibliothèque est la suivante :dans le menu principal de l'IDE Arduino, choisissez Sketch - Inclure la bibliothèque - Ajouter la bibliothèque .ZIP... puis sélectionnez votre fichier zip téléchargé... facile ¯\_(ツ)_/¯
Cette bibliothèque est nécessaire pour effectuer la génération simultanée de plusieurs tonalités sur un seul contrôleur (elle utilise des temporisateurs matériels supplémentaires et des interruptions matérielles "sous le capot" pour atteindre cet objectif). En termes simples, c'est une sorte de "multitâche redneck" sur un seul cœur de processeur sans aucun système d'exploitation =]
BTW, voici l'auteur de la bibliothèque (merci mon frère ! =] ):
http://playground.arduino.cc/Profiles/Bhagman
... et la page GitHub de la bibliothèque :
https://github.com/bhagman/Tone
DISCLAIMER 🙂 :
Franchement, mon code de programme ici est plutôt volumineux et difficile à lire. C'est principalement à cause de ce besoin de " jongler " avec trois fils de mélodie " indépendants " simultanément à partir d'un seul flux de commande linéaire. Je pensais vraiment refactoriser le code plus tard pour pouvoir séparer les mélodies les unes des autres et l'utiliser à l'avenir pour jouer différentes chansons... mais je ne le ferai probablement pas =]
Alors bonne chance. Tout commentaire est apprécié.
Merci d'avoir lu jusqu'au bout =]
Code
- Joyeux_anniversaire
Joyeux_anniversaireArduino
N'oubliez pas d'installer Tone library!!#includeTone solo;Tone bass;Tone rythm;const int t =600; // durée de la note const int tt =t*2;const int t14 =round(t*1/4);const int t24 =round(t*2/4);const int t34 =round(t*3/4);const int bassLedPin =15; // broche de signal led basse (aka A1)const int rythmLedPin =17; // broche de signal led de rythme (aka A3)const int soloLedPin =19; // broche de signal led solo (aka A5)void wait(Tone t){ while (t.isPlaying()) { } }int bassLedState =LOW;void switchBassLed(){ if (bassLedState ==LOW) bassLedState =HIGH; sinon bassLedState =LOW ; digitalWrite(bassLedPin, bassLedState);}int rythmLedState =LOW;void switchRythmLed(){ if (rythmLedState ==LOW) rythmLedState =HIGH; sinon rythmLedState =LOW; digitalWrite(rythmLedPin, rythmLedState);}int soloLedState =LOW;void switchSoloLed(){ if (soloLedState ==LOW) soloLedState =HIGH; sinon soloLedState =FAIBLE; digitalWrite(soloLedPin, soloLedState);}configuration void(void){ pinMode(14, OUTPUT); // broche de masse led (aka A0) pinMode (16, OUTPUT); // broche de masse led (aka A2) pinMode (18, OUTPUT); // broche de masse led (aka A4) pinMode (bassLedPin, OUTPUT); // broche de signal led basse pinMode(rythmLedPin, OUTPUT); // rythm led signal pin pinMode(soloLedPin, OUTPUT); // broche de signal led solo pinMode(2, OUTPUT); // broche de masse du buzzer solo pinMode(9, OUTPUT); // broche de masse du buzzer rythmique solo.begin(6); // broche de signal de buzzer solo bass.begin(12); // Broche signal buzzer basse rythm.begin(0); // broche de signal de sonnerie de rythme solo.play(NOTE_D4, t34); switchSoloLed(); attendre (seul); solo.play(NOTE_D4, t14); switchSoloLed(); wait(solo);}void loop(void){bass.play(NOTE_G3, t); switchBassLed(); rythme.play(NOTE_G4, t24); switchRythmLed(); solo.play(NOTE_E4, t); switchSoloLed(); attendre (rythme); rythme.play(NOTE_B4, t14); switchRythmLed(); attendre (rythme); rythme.play(NOTE_D5, t14); switchRythmLed(); wait(rythm);bass.play(NOTE_B3, t); switchBassLed(); rythme.play(NOTE_G4, t24); switchRythmLed(); solo.play(NOTE_D4, t); switchSoloLed(); attendre (rythme); rythme.play(NOTE_B4, t14); switchRythmLed(); attendre (rythme); rythme.play(NOTE_D5, t14); switchRythmLed(); wait(rythm);bass.play(NOTE_D4, t); switchBassLed(); rythme.play(NOTE_G4, t24); switchRythmLed(); solo.play(NOTE_G4, t); switchSoloLed(); attendre (rythme); rythme.play(NOTE_B4, t14); switchRythmLed(); attendre (rythme); rythme.play(NOTE_D5, t14); switchRythmLed(); wait(rythm);bass.play(NOTE_D4, t); switchBassLed(); rythme.play(NOTE_D5, t24); switchRythmLed(); solo.play(NOTE_FS4, tt); switchSoloLed(); attendre (rythme); rythme.play(NOTE_FS5, t14); switchRythmLed(); attendre (rythme); rythme.play(NOTE_A5, t14); switchRythmLed(); wait(rythm);bass.play(NOTE_FS4, t); switchBassLed(); rythme.play(NOTE_D5, t24); switchRythmLed(); attendre (rythme); rythme.play(NOTE_FS5, t14); switchRythmLed(); attendre (rythme); rythme.play(NOTE_A5, t14); switchRythmLed(); wait(rythm);bass.play(NOTE_A4, t); switchBassLed(); rythme.play(NOTE_D5, t24); switchRythmLed(); solo.play(NOTE_D4, t34); switchSoloLed(); attendre (rythme); rythme.play(NOTE_FS5, t14); switchRythmLed(); attendre (rythme); rythme.play(NOTE_A5, t14); switchRythmLed(); solo.play(NOTE_D4, t14); switchSoloLed(); wait(rythm);bass.play(NOTE_D4, t); switchBassLed(); rythme.play(NOTE_D5, t24); switchRythmLed(); solo.play(NOTE_E4, t); switchSoloLed(); attendre (rythme); rythme.play(NOTE_FS5, t14); switchRythmLed(); attendre (rythme); rythme.play(NOTE_A5, t14); switchRythmLed(); attendre (rythme); bass.play(NOTE_FS4, t); switchBassLed(); rythme.play(NOTE_D5, t24); switchRythmLed(); solo.play(NOTE_D4, t); switchSoloLed(); attendre (rythme); rythme.play(NOTE_FS5, t14); switchRythmLed(); attendre (rythme); rythme.play(NOTE_A5, t14); switchRythmLed(); attendre (rythme); bass.play(NOTE_A4, t); switchBassLed(); rythme.play(NOTE_D5, t24); switchRythmLed(); solo.play(NOTE_A4, t); switchSoloLed(); attendre (rythme); rythme.play(NOTE_FS5, t14); switchRythmLed(); attendre (rythme); rythme.play(NOTE_A5, t14); switchRythmLed(); attendre (rythme); bass.play(NOTE_G3, t); switchBassLed(); rythme.play(NOTE_G4, t24); switchRythmLed(); solo.play(NOTE_G4, tt); switchSoloLed(); attendre (rythme); rythme.play(NOTE_B4, t14); switchRythmLed(); attendre (rythme); rythme.play(NOTE_D5, t14); switchRythmLed(); wait(rythm);bass.play(NOTE_B3, t); switchBassLed(); rythme.play(NOTE_G4, t24); switchRythmLed(); attendre (rythme); rythme.play(NOTE_B4, t14); switchRythmLed(); attendre (rythme); rythme.play(NOTE_D5, t14); switchRythmLed(); attendre (rythme); bass.play(NOTE_D4, t); switchBassLed(); rythme.play(NOTE_G4, t24); switchRythmLed(); solo.play(NOTE_D4, t34); switchSoloLed(); attendre (rythme); rythme.play(NOTE_B4, t14); switchRythmLed(); attendre (rythme); rythme.play(NOTE_D5, t14); switchRythmLed(); solo.play(NOTE_D4, t14); switchSoloLed(); wait(rythm);bass.play(NOTE_G3, t); switchBassLed(); rythme.play(NOTE_G4, t24); switchRythmLed(); solo.play(NOTE_D5, t); switchSoloLed(); attendre (rythme); rythme.play(NOTE_B4, t14); switchRythmLed(); attendre (rythme); rythme.play(NOTE_D5, t14); switchRythmLed(); attendre (rythme); bass.play(NOTE_B3, t); switchBassLed(); rythme.play(NOTE_G4, t24); switchRythmLed(); solo.play(NOTE_B4, t); switchSoloLed(); attendre (rythme); rythme.play(NOTE_B4, t14); switchRythmLed(); attendre (rythme); rythme.play(NOTE_D5, t14); switchRythmLed(); attendre (rythme); bass.play(NOTE_D4, t); switchBassLed(); rythme.play(NOTE_G4, t24); switchRythmLed(); solo.play(NOTE_G4, t); switchSoloLed(); attendre (rythme); rythme.play(NOTE_B4, t14); switchRythmLed(); attendre (rythme); rythme.play(NOTE_D5, t14); switchRythmLed(); attendre (rythme); bass.play(NOTE_C4, t); switchBassLed(); rythme.play(NOTE_C5, t24); switchRythmLed(); solo.play(NOTE_FS4, t); switchSoloLed(); attendre (rythme); rythme.play(NOTE_E5, t14); switchRythmLed(); attendre (rythme); rythme.play(NOTE_G5, t14); switchRythmLed(); attendre (rythme); bass.play(NOTE_E4, t); switchBassLed(); rythme.play(NOTE_C5, t24); switchRythmLed(); solo.play(NOTE_E4, t); switchSoloLed(); attendre (rythme); rythme.play(NOTE_E5, t14); switchRythmLed(); attendre (rythme); rythme.play(NOTE_G5, t14); switchRythmLed(); attendre (rythme); bass.play(NOTE_G4, t); switchBassLed(); rythme.play(NOTE_C5, t24); switchRythmLed(); solo.play(NOTE_C5, t34); switchSoloLed(); attendre (rythme); rythme.play(NOTE_E5, t14); switchRythmLed(); attendre (rythme); rythme.play(NOTE_G5, t14); switchRythmLed(); solo.play(NOTE_C5, t14); switchSoloLed(); wait(rythm);bass.play(NOTE_G3, t); switchBassLed(); rythme.play(NOTE_G4, t24); switchRythmLed(); solo.play(NOTE_B4, t); switchSoloLed(); attendre (rythme); rythme.play(NOTE_B4, t14); switchRythmLed(); attendre (rythme); rythme.play(NOTE_D5, t14); switchRythmLed(); attendre (rythme); bass.play(NOTE_D3, t); switchBassLed(); rythme.play(NOTE_G4, t24); switchRythmLed(); solo.play(NOTE_G4, t); switchSoloLed(); attendre (rythme); rythme.play(NOTE_B4, t14); switchRythmLed(); attendre (rythme); rythme.play(NOTE_D5, t14); switchRythmLed(); attendre (rythme); bass.play(NOTE_FS3, t); switchBassLed(); rythme.play(NOTE_D5, t24); switchRythmLed(); solo.play(NOTE_A4, t); switchSoloLed(); attendre (rythme); attendre (rythme); rythme.play(NOTE_FS5, t14); switchRythmLed(); attendre (rythme); rythme.play(NOTE_A5, t14); switchRythmLed(); attendre (rythme); bass.play(NOTE_G3, t); switchBassLed(); rythme.play(NOTE_G4, t24); switchRythmLed(); solo.play(NOTE_G4, tt); switchSoloLed(); attendre (rythme); rythme.play(NOTE_B4, t14); switchRythmLed(); attendre (rythme); rythme.play(NOTE_D5, t14); switchRythmLed(); wait(rythm);bass.play(NOTE_B3, t); switchBassLed(); rythme.play(NOTE_G4, t24); switchRythmLed(); attendre (rythme); rythme.play(NOTE_B4, t14); switchRythmLed(); attendre (rythme); rythme.play(NOTE_D5, t14); switchRythmLed(); attendre (rythme); solo.play(NOTE_D4, t34); switchSoloLed(); attendre (seul); solo.play(NOTE_D4, t14); switchSoloLed(); attendre(solo);}
Processus de fabrication
- Surveillance du CO2 avec le capteur K30
- Communication sourds-aveugles avec 1Sheeld/Arduino
- Contrôler l'accepteur de pièces avec Arduino
- Fleurs - Arduino Nano, CrazyCircuits, DFRobot
- Arduino avec Bluetooth pour contrôler une LED !
- Capteur d'empreintes digitales capacitif avec un Arduino ou ESP8266
- Jouer avec Nextion Display
- Bras robotique contrôlé par Nunchuk (avec Arduino)
- Arduino Nano :contrôler 2 moteurs pas à pas avec joystick