



Lecteur MP3 Série Catalex pour Arduino UNO : Installation et Contrôle Simplifiés
Composants et fournitures
| Composant | Quantité |
|---|---|
| Arduino UNO | 1 |
| Lecteur MP3 série Catalex (modèle V1.0) | 1 |
| Fichiers audio (MP3/WAV) sur carte micro SD | 1 |
Applications et services en ligne
- Arduino IDE
À propos du projet
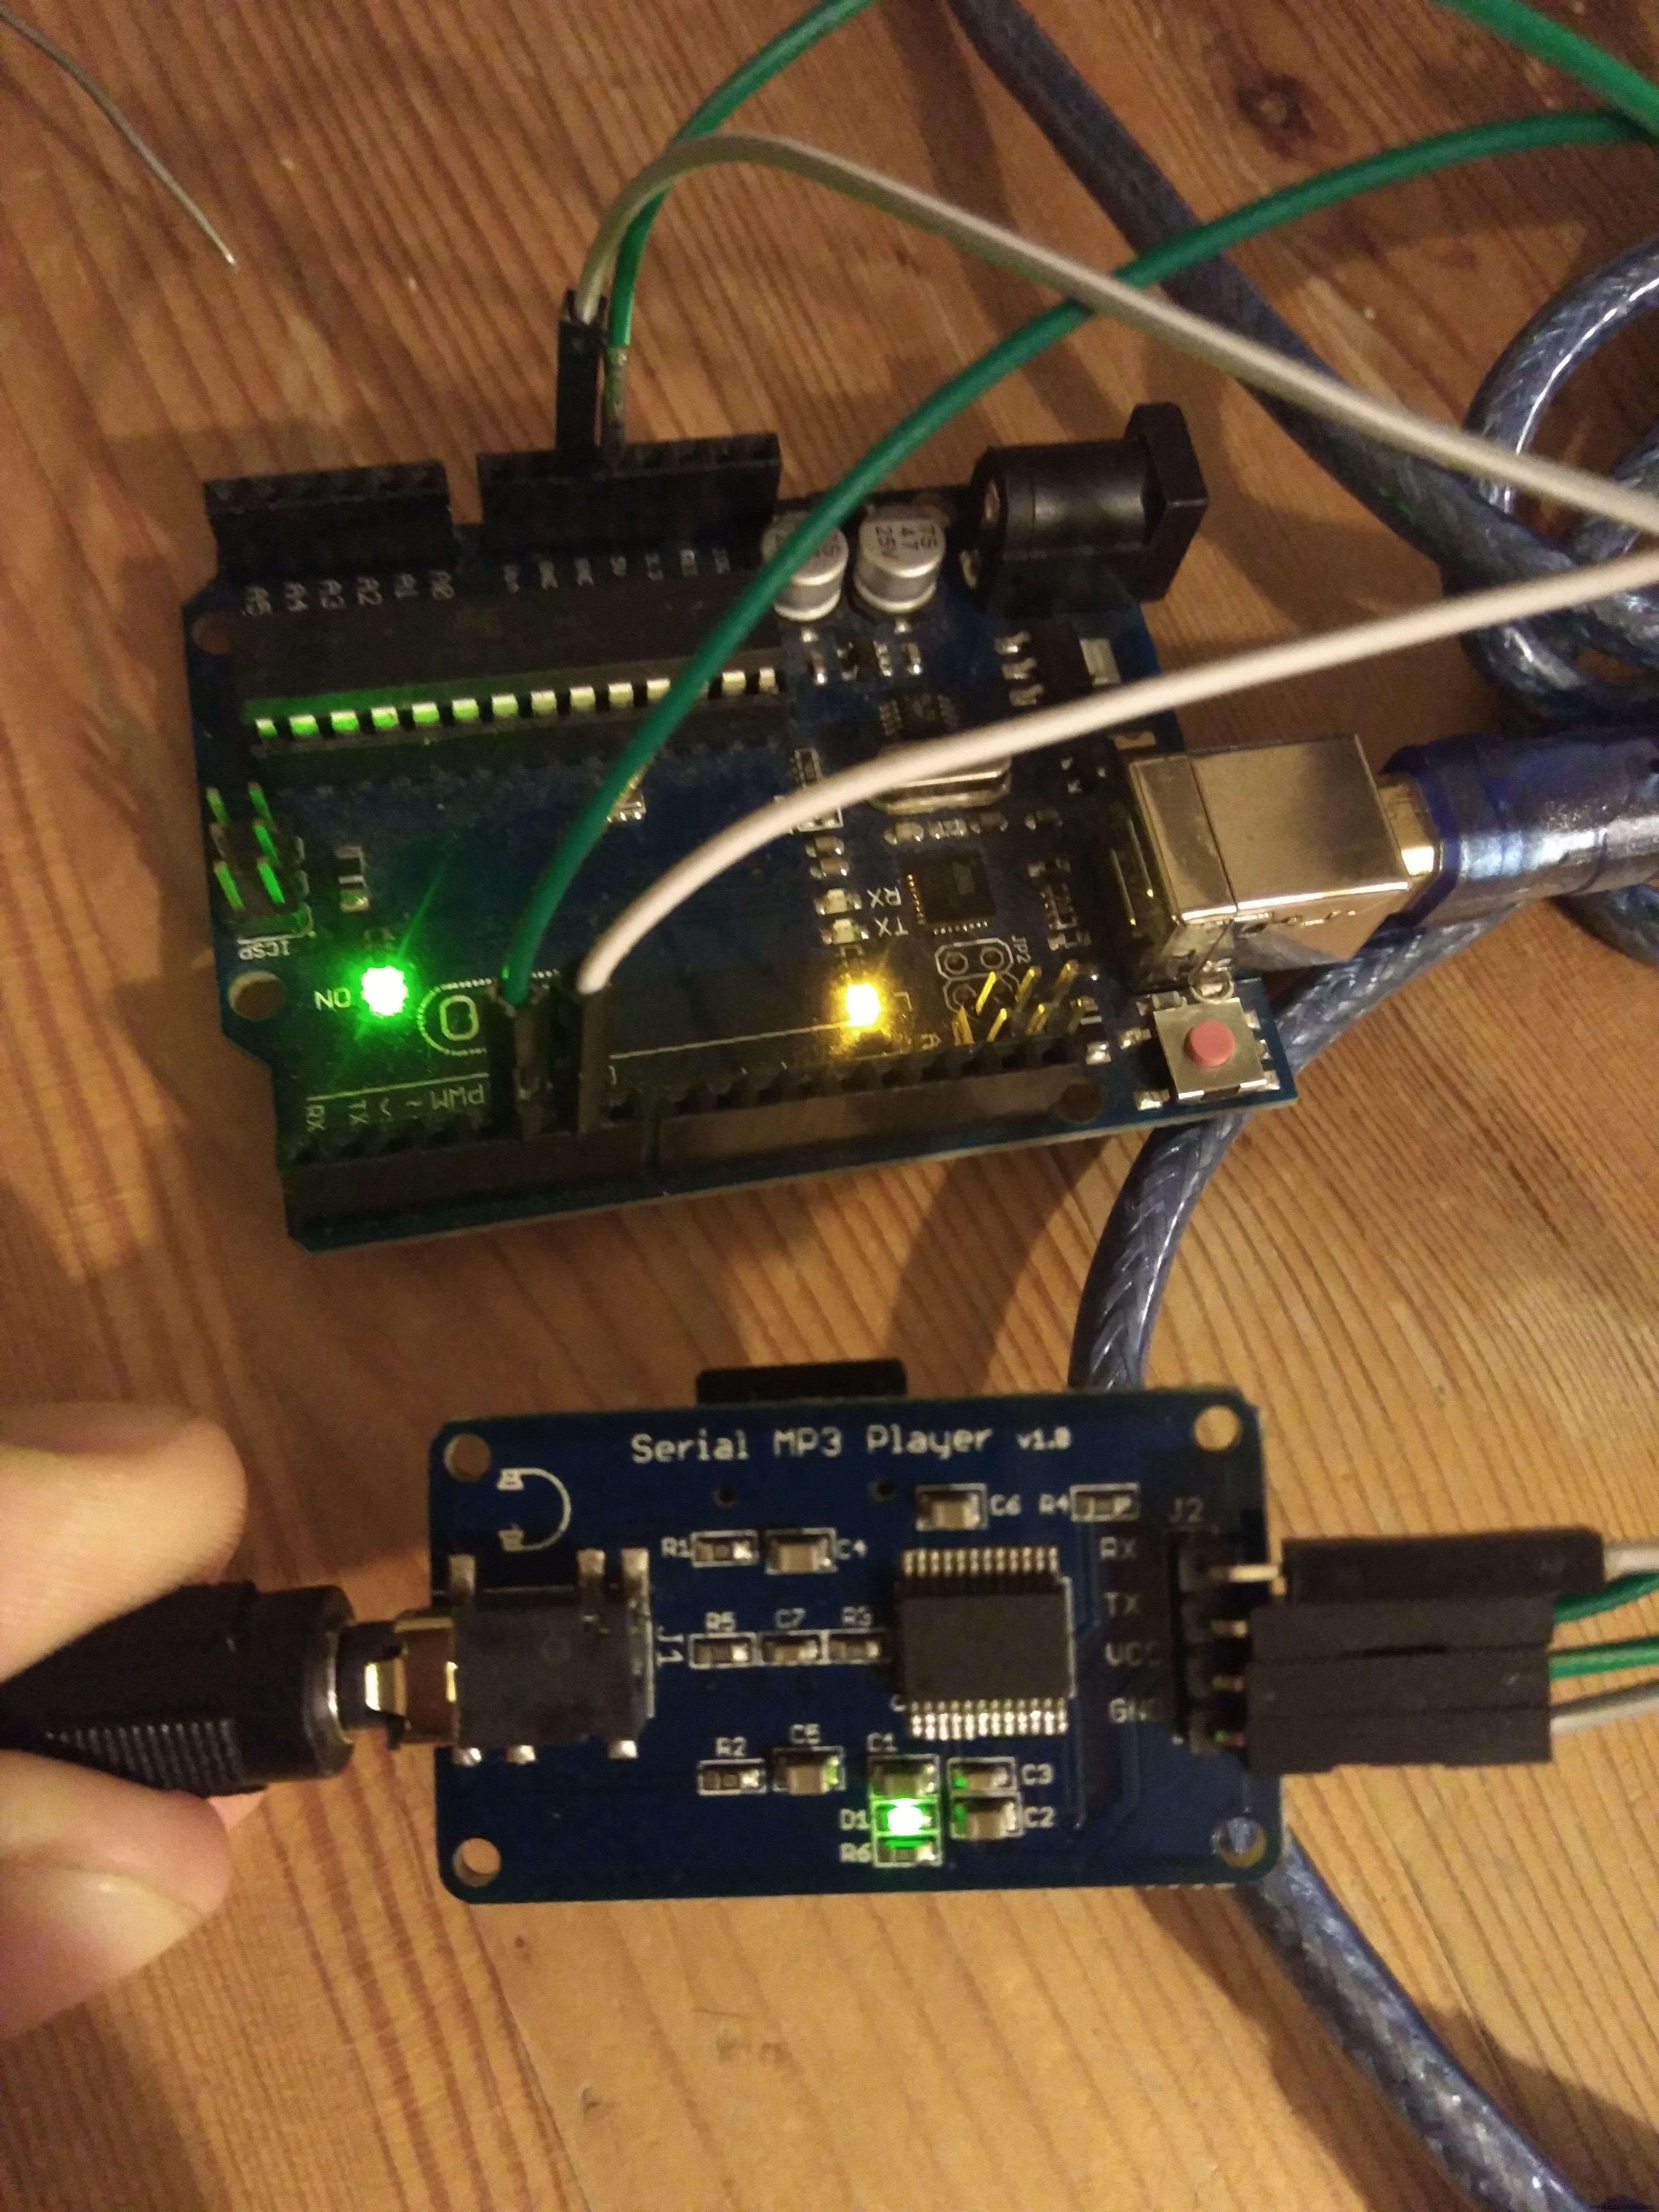
Comment utiliser le lecteur MP3 série V1.0 de Catalex
Le module Catalex communique via une liaison série simple. Voici les étapes pour le mettre en œuvre :
1. Bibliothèques et configuration des broches
#include <SoftwareSerial.h>

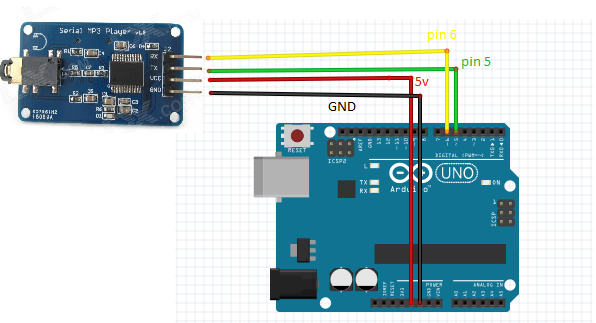
#define ARDUINO_RX 5  // Connecter au TX du module MP3
#define ARDUINO_TX 6  // Connecter au RX du module
SoftwareSerial mySerial(ARDUINO_RX, ARDUINO_TX);
2. Commandes principales (d'après la fiche technique)
// Format de commande : 0x7E FF 06 CMD 00 DATA_H DATA_L EF
static int8_t Send_buf[8] = {0};

#define NEXT_SONG       0X01
#define PREV_SONG       0X02
#define CMD_PLAY_W_INDEX 0X03  // Nécessite numéro de piste
#define VOLUME_UP_ONE   0X04
#define VOLUME_DOWN_ONE 0X05
#define CMD_SET_VOLUME  0X06  // Volume 0-30 (0x1E)
#define CMD_SEL_DEV     0X09  // Sélection périphérique
#define DEV_TF          0X02  // Carte TF (micro SD)
#define SLEEP_MODE_START 0X0A
#define SLEEP_MODE_WAKEUP 0X0B
#define CMD_RESET       0X0C
#define CMD_PLAY        0X0D
#define CMD_PAUSE       0X0E
#define CMD_PLAY_WITHFOLDER 0X0F  // Dossier/piste
#define STOP_PLAY       0X16
#define PLAY_FOLDER     0X17
#define SET_CYCLEPLAY   0X19
#define CMD_PLAY_WITHVOLUME 0X22  // Volume + piste
3. Fonction d'envoi de commande
void sendCommand(int8_t command, int16_t dat) {
  delay(20);
  Send_buf[0] = 0x7E;
  Send_buf[1] = 0xFF;
  Send_buf[2] = 0x06;
  Send_buf[3] = command;
  Send_buf[4] = 0x00;  // Pas de retour
  Send_buf[5] = (int8_t)(dat >> 8);
  Send_buf[6] = (int8_t)(dat);
  Send_buf[7] = 0xEF;

  for (uint8_t i = 0; i < 8; i++) {
    mySerial.write(Send_buf[i]);
  }
}
4. Initialisation (setup)
void setup() {
  Serial.begin(9600);
  mySerial.begin(9600);
  delay(500);  // Attente initialisation puce
  sendCommand(CMD_SEL_DEV, DEV_TF);  // Sélection carte TF
  delay(200);
}
5. Lecture d'une piste (loop)
void loop() {
  // Joue la piste 1 avec volume 15 (0x0F)
  sendCommand(CMD_PLAY_WITHVOLUME, 0x0F01);
  delay(1000000);  // Répétition toutes les ~100 secondes
}
Organisation des fichiers sur la carte SD
Le module lit les fichiers par ordre alphabétique. Pour un contrôle précis :
- Créez des dossiers nommés
01,02, etc. - Nommez les fichiers
001_titre.mp3,002_titre.mp3... - La commande
CMD_PLAY_WITHFOLDERpermet alors de cibler dossier/piste.
Bon bricolage !
Code complet (test)
// Réorganisé par Javier Muñoz 10/11/2016
#include <SoftwareSerial.h>
#define ARDUINO_RX 5
#define ARDUINO_TX 6
SoftwareSerial mySerial(ARDUINO_RX, ARDUINO_TX);

// Définitions des commandes (identiques ci-dessus)
static int8_t Send_buf[8] = {0};
#define NEXT_SONG 0X01
#define PREV_SONG 0X02
#define CMD_PLAY_W_INDEX 0X03
#define VOLUME_UP_ONE 0X04
#define VOLUME_DOWN_ONE 0X05
#define CMD_SET_VOLUME 0X06
#define SET_DAC 0X17
#define CMD_PLAY_WITHVOLUME 0X22
#define CMD_SEL_DEV 0X09
#define DEV_TF 0X02
#define SLEEP_MODE_START 0X0A
#define SLEEP_MODE_WAKEUP 0X0B
#define CMD_RESET 0X0C
#define CMD_PLAY 0X0D
#define CMD_PAUSE 0X0E
#define CMD_PLAY_WITHFOLDER 0X0F
#define STOP_PLAY 0X16
#define PLAY_FOLDER 0X17
#define SET_CYCLEPLAY 0X19

void setup() {
  Serial.begin(9600);
  mySerial.begin(9600);
  delay(500);
  sendCommand(CMD_SEL_DEV, DEV_TF);
  delay(200);
}

void loop() {
  sendCommand(CMD_PLAY_WITHVOLUME, 0x0F01);
  delay(1000000);
}

void sendCommand(int8_t command, int16_t dat) {
  delay(20);
  Send_buf[0] = 0x7E;
  Send_buf[1] = 0xFF;
  Send_buf[2] = 0x06;
  Send_buf[3] = command;
  Send_buf[4] = 0x00;
  Send_buf[5] = (int8_t)(dat >> 8);
  Send_buf[6] = (int8_t)(dat);
  Send_buf[7] = 0xEF;
  for (uint8_t i = 0; i < 8; i++) {
    mySerial.write(Send_buf[i]);
    Serial.print(Send_buf[i], HEX);  // Debug sur moniteur série
  }
  Serial.println();
}
Schéma de câblage
Alimentation : 3,2 V à 5 V, consommation ~200 mA.
Enregistreur GPS Avancé : Suivi de Vol en Temps Réel, Surveillance de l'Altitude et de la Vitesse Maximales
Construisez Vos Propres Pales de Direction pour Simulateur de Vol : Guide DIY Étape par Étape
Processus de fabrication
- Piano mécanique : fusion de la tradition acoustique et de la précision automatisée
- Amplifier le message de la crise maintenance : téléchargez versions Blues & Reggae de la « Chanson de la Crise Maintenance »
- Poupée interactive « Squid Game » avec Arduino UNO – Projet DIY
- Construire un Spybot Arduino piloté par Bluetooth
- FlickMote : Télécommande IR à gestes pour maison connectée
- TV-B-Gone DIY Arduino : Télécommande universelle pour toutes les TV
- Construire une horloge maître LED personnalisée avec alarme – Visible à 12 mètres
- Find Me : Localisateur d'objets intelligent avec Arduino et Bluetooth
- Solutions d'alimentation optimisées pour projets Arduino