



Lampe Zerynth : Contrôle d'ambiance IoT intelligent avec LEDs NeoPixel
Composants et fournitures
| Zerynth Shield | × | 1 |
| Arduino Due | × | 1 |
| STM32 Nucleo ST NUCLEO | × | 1 |
| Particle Photon | × | 1 |
| UDOO DUAL | × | 1 |
| Adafruit NeoPixel | × | 1 |
Applications et services en ligne
- Zerynth Studio
- Zerynth App
À propos de ce projet
Les normes sans fil à basse consommation combinées aux LEDs ultra-miniatures à bas coût, capteurs et dispositifs de communication ont fait de l'éclairage intelligent un catalyseur pour l'Internet des Objets et la domotique.
Dans ce tutoriel, nous verrons comment contrôler une bande de LEDs NeoPixel via mobile en utilisant l'application Zerynth, qui affiche un sélecteur de couleur et un menu pour la sélection de diverses animations préconfigurées.
Étape 1 : Matériel requis
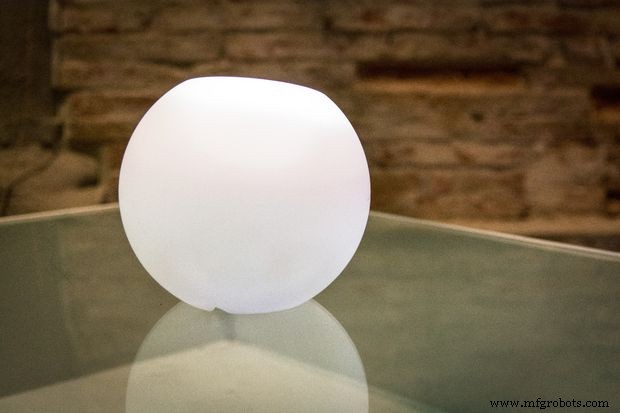
Le projet nécessite peu d'éléments :
- Zerynth Studio : un environnement de développement Python multi-plateforme et basé navigateur avec synchronisation cloud et gestion de cartes. Peu importe l'OS que vous utilisez, Zerynth fonctionne ! Téléchargez et installez Zerynth (https://www.zerynth.com/zerynth-studio/).
- Zerynth App : l'interface mobile Zerynth pour objets intelligents et systèmes IoT. N'importe quel mobile devient l'affichage et la télécommande de l'objet. Téléchargement : https://www.zerynth.com/zerynth-app/
- Zerynth Shield (disponible ici : https://store.open-electronics.org/index.php?_route_=Shield_ZERYNTH&search=toi). Une carte multi-capteurs prête à l'emploi qui ajoute des fonctions intelligentes à vos objets du quotidien.
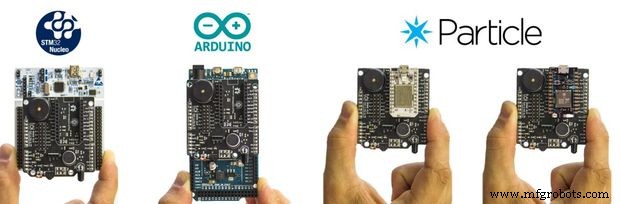
- Arduino DUE ou ST Nucleo F401RE ou Particle Photon ou UDOO ou Flip&Clip par Mikroelektronika. Peu importe la carte que vous utilisez, Zerynth est multi-carte compatible ! Vous pouvez trouver tous les détails des cartes supportées ici : https://www.zerynth.com/zerynth-studio/
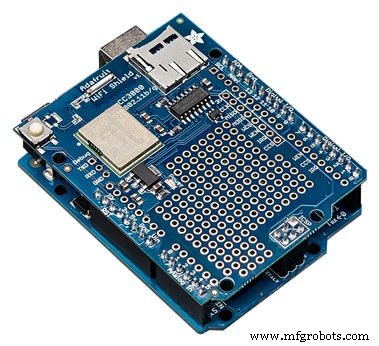
- Si vous n'utilisez pas Particle Photon (qui a un module WiFi intégré), vous avez besoin d'un élément qui connecte la carte au web, comme le WiFi Shield d'Adafruit. Cependant, vous pouvez utiliser n'importe quel autre adaptateur qui monte la puce WiFi CC3000 Texas Instruments (https://www.ti.com/product/cc3000).
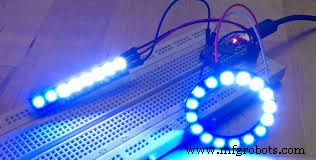
- Une bande (ou un anneau) de NeoPixel LEDs d'Adafruit (disponible ici https://www.adafruit.com/products/1426)
- Une lampe en verre ou imprimée en 3D. Le choix est vôtre.
Étape 2 : Assemblage

- Empilez simplement le WiFi Shield et le Zerynth Shield sur votre Arduino (ou ST Nucleo ou UDOO). Si vous utilisez Particle Photon, empilez-le simplement sur les connecteurs dédiés du Zerynth Shield.
- Connectez les LEDs NeoPixel au port correspondant sur le Zerynth Shield.
- Mettez toutes les cartes et les LEDs dans la lampe.
Étape 3 : Programmation
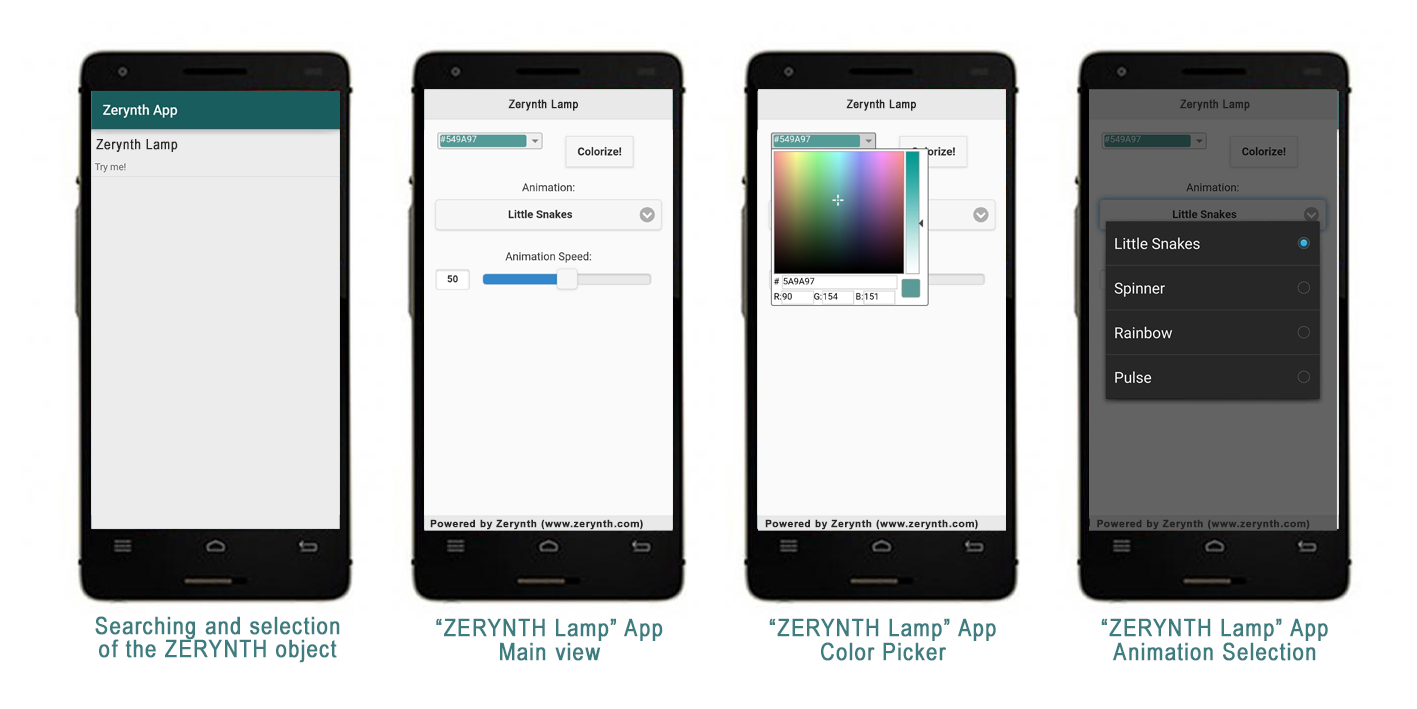
Utiliser Zerynth est très facile !
- Connectez et « virtualisez » votre carte (déjà expliqué ici https://bit.ly/Hackster-VIPER-Theremin)
- Créez un nouveau projet dans Zerynth (déjà expliqué ici https://bit.ly/Hackster-IoT-Notes-Printer). Attention : vous devez créer 3 (+1) fichiers : main.py, animation.py, template.html (et project.md)
- Copiez le code ci-dessous
- Téléversez le code sur votre carte et c'est fini !
Après avoir allumé la lampe, elle se connectera automatiquement au réseau prédéfini.
Ensuite, ouvrez simplement l'application Zerynth, qui ira à la recherche d'objets Zerynth connectés au réseau, sélectionnez l'objet d'intérêt, dans ce cas la « Zerynth Lamp », et vous pouvez interagir avec ! Dans ce cas, l'application Zerynth affiche un sélecteur de couleur et un menu pour la sélection de diverses animations préconfigurées.
Le code est très simple et contient beaucoup de commentaires. Pour toute question ou suggestion, n'hésitez pas à poster sur les forums de la communauté Zerynth : https://community.zerynth.com/
Étape 4 : Rendez l'IoT plus brillant !
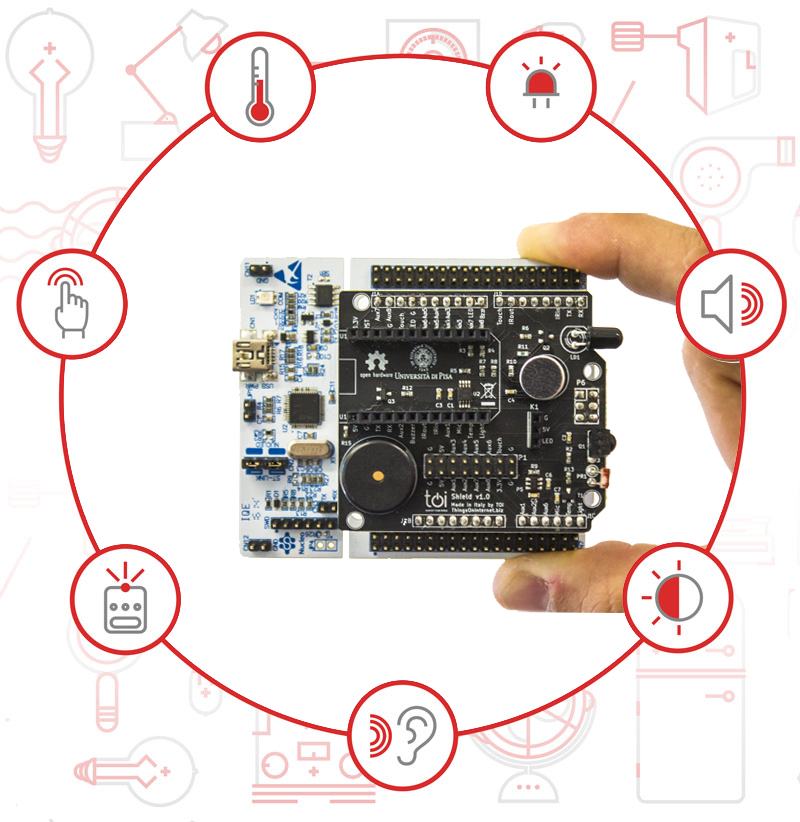
Vous avez aimé ? Passons au niveau supérieur !
Le Zerynth Shield présente un ensemble de capteurs et actionneurs, incluant des capteurs pour la détection tactile, LED infrarouge, microphone, capteur de lumière et capteur de température. Vous pouvez partir de cet exemple de code très simple pour développer le comportement que vous préférez. Utilisez le Zerynth Shield pour étendre les fonctionnalités de la Lampe !
Luigi F. Cerfeda (@L_F_Cerfeda) – Équipe Zerynth
Code
main.py (Python)
################################################################################
# Zerynth Lamp
# Created by Zerynth Team 2015 CC
# Authors: G. Baldi, D. Mazzei
################################################################################
# Import modules needed
import streams
from bcm43362 import bcm43362 as wifi_driver
from wireless import wifi
import animation
from toishield import toishield
# Import zerynthapp module
from zerynthapp import zerynthapp

streams.serial()

# Connect to a wifi network
try:
    wifi_driver.auto_init()
    print("Établissement du lien...")
    wifi.link("SSID", wifi.WIFI_WPA2, "password")
    print("OK !")
except Exception as e:
    print(e)

# Save template.html in board flash with new_resource
new_resource("template.html")

#### ZerynthApp Setup
# :: Javascript to Python ::
# The following functions will be called when buttons are pressed
def change_color(r, g, b):
    animation.setup_color(r, g, b)

def change_animation(n):
    animation.setup_anim(n)

def change_speed(n):
    animation.setup_anim_speed(n)

# Configure Zerynth app with name, description and template url
vp = zerynthapp.ZerynthApp("Zerynth Lamp", "Try me!", "resource://template.html")

# Every time Javascript generates events, corresponding functions are called
vp.on("change_color", change_color)
vp.on("change_animation", change_animation)
vp.on("change_speed", change_speed)

# Run the ZerynthApp!
vp.run()

# Since vp.run starts a new thread, you can do whatever else you want down here!
# Let's control leds
animation.start(D6, 24)
template.html (HTML)
<html>
<head>
<zerynth/>
<zerynth-jquery/>
<zerynth-jquery-mobile/>
<zerynth-jqwidgets/>
<meta name="viewport" content="width=device-width, initial-scale=1">
</head>
<body>
<div data-role="page">
<div data-role="header"><h1>Zerynth Lamp</h1></div>
<div role="main" class="ui-content" style="text-align:center">
<div style="margin: 3px; float: left;" id="dropDownButton">
<div style="padding: 3px;">
<div id="colorPicker"></div>
</div>
</div>
<button class="ui-btn ui-btn-inline ui-shadow" onclick="ZerynthApp.call('change_color',cur_color.r,cur_color.g,cur_color.b)">Colorize!</button>
<form>
<div data-role="fieldcontain">
<label for="animselect">Animation:</label>
<select name="animselect" id="animselect">
<option value="0">Little Snakes</option>
<option value="1">Spinner</option>
<option value="2">Rainbow</option>
<option value="3">Pulse</option>
</select>
</div>
</form>
<form>
<label for="speedslider">Animation Speed:</label>
<input type="range" name="speedslider" id="speedslider" data-highlight="true" min="0" max="100" value="50">
</form>
</div>
<div data-role="footer">Powered by Zerynth (www.zerynth.com)</div>
</div>
<script>
var cur_color = {r: 0x54, g: 0x9a, b:0x97};
function getTextElementByColor(color) {
  if (color == 'transparent' || color.hex == "") {
    return $("<div style='text-shadow: none; position: relative; padding-bottom: 2px; margin-top: 2px;'>transparent</div>");
  }
  var element = $("<div style='text-shadow: none; position: relative; padding-bottom: 2px; margin-top: 2px;'>#" + color.hex + "</div>");
  var nThreshold = 105;
  var bgDelta = (color.r * 0.299) + (color.g * 0.587) + (color.b * 0.114);
  cur_color.r = color.r;
  cur_color.g = color.g;
  cur_color.b = color.b;
  var foreColor = (255 - bgDelta < nThreshold) ? 'Black' : 'White';
  element.css('color', foreColor);
  element.css('background', "#" + color.hex);
  element.addClass('jqx-rc-all');
  return element;
}
$(document).ready(function () {
  console.log("ready!")
  $("#colorPicker").on('colorchange', function (event) {
    $("#dropDownButton").jqxDropDownButton('setContent', getTextElementByColor(event.args.color));
  });
  $("#colorPicker").jqxColorPicker({ color: "5a9a97", colorMode: 'saturation', width: 220, height: 220});
  $("#dropDownButton").jqxDropDownButton({ width: 150, height: 22});
  $("#dropDownButton").jqxDropDownButton('setContent', getTextElementByColor(new $.jqx.color({ hex: "549a97" })));
  ZerynthApp.jquerymobile_scalecontent();
  $("#animselect").change(function() {
    ZerynthApp.call('change_animation',parseInt($('#animselect').val()));
  });
  $("#speedslider").on('slidestop',function() {
    ZerynthApp.call('change_speed',parseInt($('#speedslider').val()));
  });
});
</script>
</body>
</html>
animation.py (Python)
################################################################################
# Zerynth Lamp
# Created by Zerynth Team 2015 CC
# Authors: G. Baldi, D. Mazzei
################################################################################
# Lamp animation functions
from neopixel import ledstrips as neo
import threading

lock = threading.Lock()

# The Zerynth color :)
color = [0x54, 0x9a, 0x97]
anim = 0
anim_speed = 50
leds = None
layer0 = None
layer1 = None
layer2 = None
npins = 0
stopped = False
stopcolor = [0xff, 0xff, 0xff]

# Create all the needed layers
# Let's define some coefficients for smooth animation (half a sinus wave)
animation_coefficients = [
    0, 0.2588190451, 0.5, 0.7071067812, 0.8660254038, 0.9659258263,
    1, 0.9659258263, 0.8660254038, 0.7071067812, 0.5, 0.2588190451
]

rainbow = [
    (0xff, 0x00, 0x00), (0xff, 0x7f, 0x00), (0xff, 0xff, 0x00),
    (0x00, 0xff, 0x00), (0x00, 0x00, 0xff), (0x4b, 0x00, 0x82),
    (0x8f, 0x00, 0xff)
]

def setup_anim(n):
    global layer0, layer1, layer2, anim
    # Fill layers with their initial values
    lock.acquire()
    leds.clear()
    layer2.clear()
    layer0.clear()
    layer1.clear()
    n = n % 4
    if n == 0:
        layer0[0] = (100, 0, 0)
        layer0[1] = (100, 0, 0)
        layer0[2] = (100, 0, 0)
        layer1[0] = (0, 100, 0)
        layer1[1] = (0, 100, 0)
        layer1[2] = (0, 100, 0)
    elif n == 1:
        for x in range(npins // 2):
            layer0[x] = (100 // (2 * x + 1), 0, 0)
            layer1[npins - x - 1] = (0, 100 // (2 * x + 1), 0)
        layer2.clear()
    elif n == 2:
        layer1.clear()
        pstep = 0
        for x in range(npins):
            step = x * len(rainbow) / npins
            rx = (rainbow[int(step)][0] + rainbow[int(pstep)][0]) // 4
            gx = (rainbow[int(step)][1] + rainbow[int(pstep)][1]) // 4
            bx = (rainbow[int(step)][2] + rainbow[int(pstep)][2]) // 4
            layer0[x] = (rx, gx, bx)
            pstep = step
    elif n == 3:
        layer0.clear()
        layer1.clear()
    anim = n
    lock.release()

def setup_anim_speed(n):
    global anim_speed
    anim_speed = n

def setup_color(r, g, b):
    global color
    # print("Color:", r, g, b)
    color[0] = r
    color[1] = g
    color[2] = b

# Create a function to handle background animation
def animate_background(delay):
    global color
    step = 0
    while True:
        if (anim == 3 or anim == 0) and not stopped:
            lock.acquire()
            layer2.setall(int(color[0] * animation_coefficients[step] / 2),
                         int(color[1] * animation_coefficients[step] / 2),
                         int(color[2] * animation_coefficients[step] / 2))
            lock.release()
            step += 1
            if step >= len(animation_coefficients):
                step = 0
        else:
            lock.acquire()
            layer2.clear()
            layer2.setall(stopcolor[0], stopcolor[1], stopcolor[2])
            lock.release()
        sleep(delay + 500 - 5 * anim_speed)

def animate_foreground(delay):
    while True:
        if not stopped:
            lock.acquire()
            if anim == 0:
                layer0.lshift()
                layer1.rshift()
            elif anim == 1:
                layer0.rshift()
                layer1.rshift()
            elif anim == 2:
                layer0.rshift()
                layer1.rshift()
            elif anim == 3:
                layer0.lshift()
                layer1.lshift()
            lock.release()
        else:
            lock.acquire()
            layer0.clear()
            layer1.clear()
            lock.release()
        sleep(delay + 100 - anim_speed)

def start(pin, numpins):
    global leds, layer0, layer1, layer2, npins
    npins = numpins
    leds = neo.LedStrip(pin, numpins)
    layer0 = neo.LedStrip(pin, numpins)
    layer1 = neo.LedStrip(pin, numpins)
    layer2 = neo.LedStrip(pin, numpins)
    setup_anim(0)
    setup_anim_speed(50)
    # Start the background animation thread
    thread(animate_background, 500)
    # Start the foreground animation thread
    thread(animate_foreground, 50)
    while True:
        # Clear leds
        leds.clear()
        # Now, acquire the lock
        lock.acquire()
        # Merge the first and second layer
        leds.merge(layer0)
        leds.merge(layer1)
        # Merge the background layer only where leds is transparent (0,0,0)
        leds.merge(layer2, neo.first_color)
        # Release the lock
        lock.release()
        # And light it up!
        leds.on()
        sleep(50)

def stop(r, g, b):
    global stopped, stopcolor
    stopcolor[0] = r
    stopcolor[1] = g
    stopcolor[2] = b
    stopped = True

def resume():
    global stopped
    stopped = False
    setup_anim(anim)
Schémas

Processus de fabrication
- Propagation du signal électrique à la vitesse de la lumière : une expérience de pensée à 300 000 km
- Les lanternes à gaz : évolution, conception et fabrication moderne
- Pointeur laser : conception, fabrication et aperçu de la sécurité
- Lampe Torche : De l'Invention à l'Innovation Moderne
- Feux de signalisation : ingénierie, histoire et innovations futures
- Du Feu au Filament : L'Évolution et la Production de l'Ampoule Moderne
- Construire un système de surveillance température et lumière multi-capteurs avec Raspberry Pi et DS18B20
- Feu de circulation intelligent : Éclairage public adaptatif alimenté par l'IoT
- Capteur de lumière numérique – Alimenter une LED avec la lumière ambiante via Windows 10 IoT Core